Kerim Koç

Contents
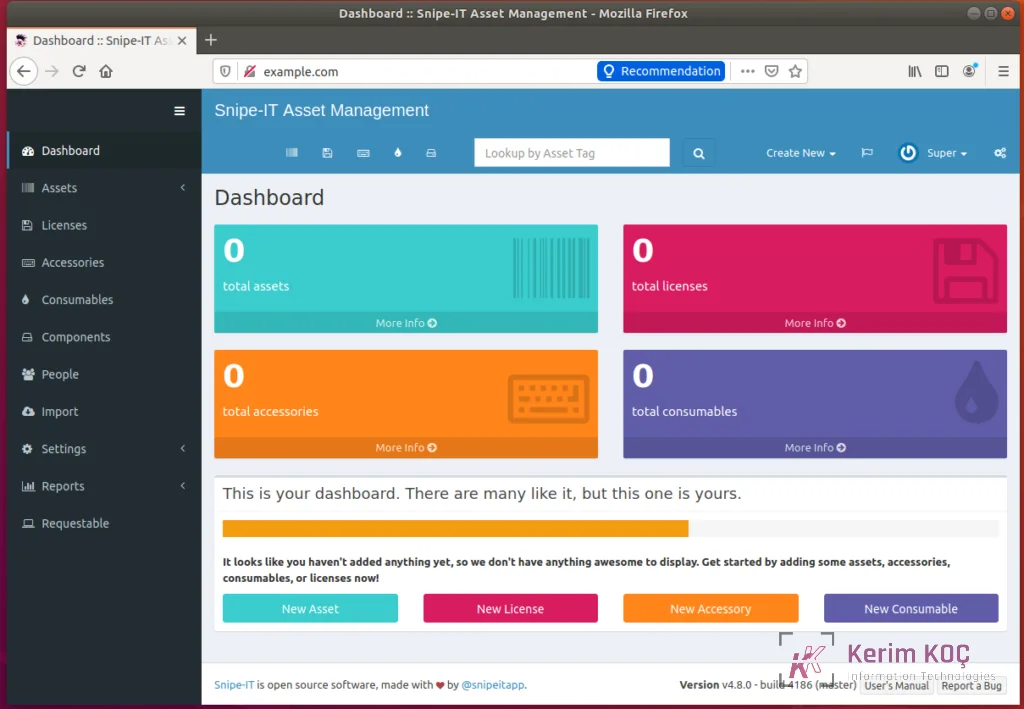
Snipe-IT is a free, open-source IT asset management system written in PHP.
With Snipe-IT, you can easily manage your IT assets through its user-friendly portal, including the management of users and security roles.
Whether you are building a personal or a company asset management platform, Snipe-IT, with its intuitive and powerful user and admin dashboard, can help you create and manage your content on any device…
For more information about Snipe-IT, please visit its homepage .
Follow the steps below to start installing Snipe-IT:
Step 1: Install Apache2 HTTP
The Apache2 HTTP Server is the most popular web server in use. Install it because Snipe-IT needs it.
To install Apache2 HTTP on an Ubuntu server, run the following commands.
sudo apt update
sudo apt install apache2
After installing Apache2, the following commands can be used to stop , start and enable the Apache2 service so that it always starts with server boots .
sudo systemctl stop apache2.service
sudo systemctl start apache2.service
sudo systemctl enable apache2.service
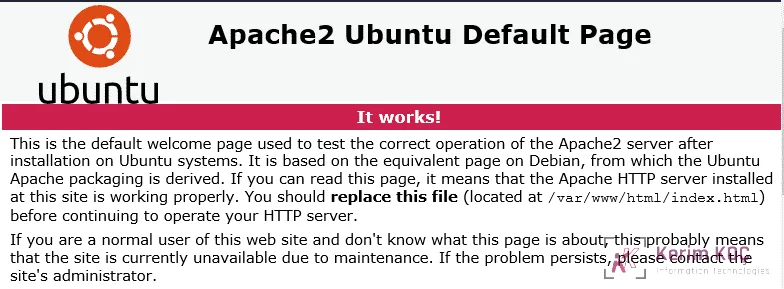
To find out whether the Apache2 HTTP server is installed, simply open your web browser and type the server's IP or hostname.
When you see a page similar to the one below, Apache2 is installed and running.
Step 2: Install the MariaDB Database Server
Snipe-IT also needs a database server to store its content. The MariaDB database server is a great place to start when looking at open-source database servers to use with Snipe-IT.
Run the following commands to install MariaDB.
sudo apt install mariadb-server mariadb-client
After installing MariaDB, the following commands can be used to stop , start and enable the MariaDB service so that it always starts when the server boots .
Run these on Ubuntu
sudo systemctl stop mariadb.service
sudo systemctl start mariadb.service
sudo systemctl enable mariadb.service
After that, run the following commands to secure the MariaDB server by creating a root password and disallowing remote root access.
sudo mysql_secure_installation
When prompted, answer the following questions by following the guide.
- Enter current password for root (enter for none): Just press the Enter
- Set root password? [Y/n]: Y
- New password: Enter password
- Re-enter new password: Repeat password
- Remove anonymous users? [Y/n]: Y
- Disallow root login remotely? [Y/n]: Y
- Remove test database and access to it? [Y/n]: Y
- Reload privilege tables now? [Y/n]: Y
Restart the MariaDB server
To test whether MariaDB is installed, type the following command to log in to the MariaDB server
sudo mysql -u root -p
Then type the password you created above to log in. If successful, you should see the MariaDB welcome message
Step 3: Install PHP 7.2 and Related Modules
PHP 7.2may not be available in the default Ubuntu repositories. To install it, you will need to get it from third-party repositories.
To upgrade to PHP 7.2, run the following commands to add the third-party repository below.
sudo apt-get install software-properties-common
sudo add-apt-repository ppa:ondrej/php
Then update and upgrade to PHP 7.2
sudo apt update
Then run the following commands to install PHP 7.2 and related modules.
sudo apt install php7.2 libapache2-mod-php7.2 php7.2-common php7.2-gmp php7.2-curl php7.2-intl php7.2-mbstring php7.2-xmlrpc php7.2-mysql php7.2-gd php7.2-bcmath php7.2-xml php7.2-cli php7.2-zip php7.2-sqlite
After installing PHP 7.2, run the following commands to open the PHP default configuration file for Apache2.
sudo nano /etc/php/7.2/apache2/php.ini
Then make the changes to the following lines in the file and save it. The values below are great settings to apply to your environments.
file_uploads = On
allow_url_fopen = On
short_open_tag = On
memory_limit = 256M
upload_max_filesize = 100M
max_execution_time = 360
max_input_vars = 1500
date.timezone = Europe/Istanbul
After making the change above, save and close the file.
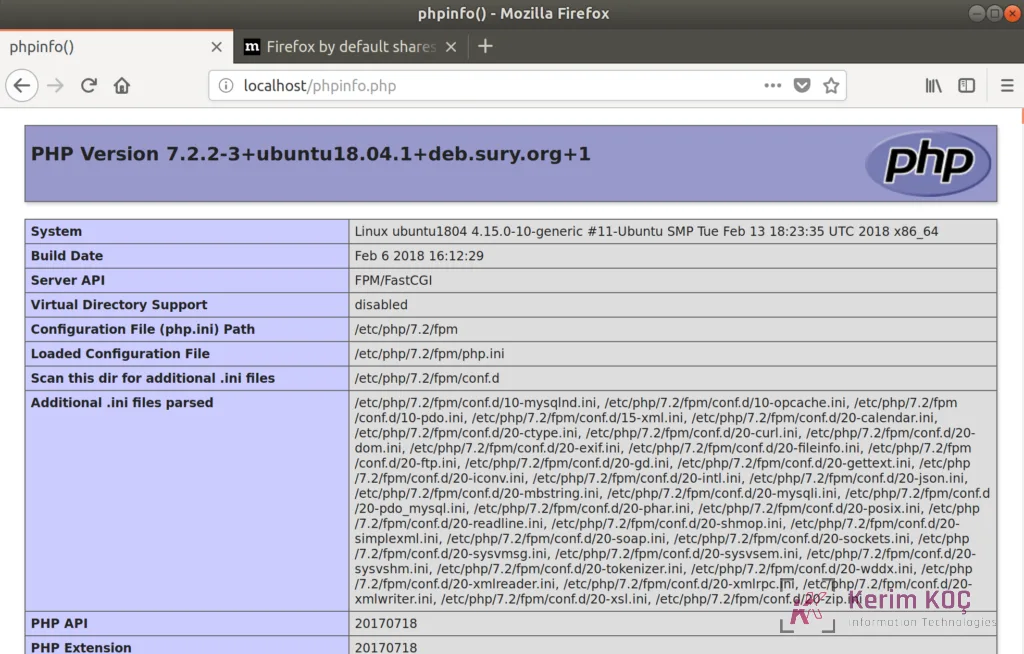
To test the PHP 7.2 settings with Apache2, create a phpinfo.php file in the Apache2 root directory by running the following commands.
sudo nano /var/www/html/phpinfo.php
Then type the following content and save the file.
<?php phpinfo( ); ?>
Save the file. Then browse to your server hostname followed by/phpinfo.php
You should see the PHP default test page.
Step 4: Create the Snipe-IT Database
Now that you have installed all the necessary packages, continue below to start configuring the servers. First, create a Snipe-IT database.
Run the following commands to log in to MariaDB. When asked for a password, type the root password you created above.
sudo mysql -u root -p
Then create a database named snipeit.
CREATE DATABASE snipeit;
Create a database user named snipeituser with a new password
CREATE USER 'snipeituser'@'localhost' IDENTIFIED BY 'new_password_here';
Then grant the user full access to the snipeit database .
GRANT ALL ON snipeit.* TO 'snipeituser'@'localhost' WITH GRANT OPTION;
Finally, save your changes and exit.
FLUSH PRIVILEGES;
EXIT;
Step 5: Download the Latest Snipe-IT Release
To get the latest version of Snipe-IT, you may want to use the GitHub repository. To start, install Composer, Curl and other dependencies.
sudo apt install curl git
curl -sS https://getcomposer.org/installer | sudo php -- --install-dir=/usr/local/bin --filename=composer
After installing curl and Composer above, switch to the Apache2 root directory and download the Snipe-IT packages from GitHub.
cd /var/www/
sudo git clone https://github.com/snipe/snipe-it snipeit
sudo cp /var/www/snipeit/.env.example /var/www/snipeit/.env
Then edit the .env file created above and make the highlighted changes to suit your environment.
sudo nano /var/www/snipeit/.env
Make the highlighted changes.
# --------------------------------------------
# REQUIRED: BASIC APP SETTINGS
# --------------------------------------------
APP_ENV=production
APP_DEBUG=false
APP_KEY=ChangeMe
APP_URL=example.com
APP_TIMEZONE='UTC'
APP_LOCALE=en
MAX_RESULTS=500

# --------------------------------------------
# REQUIRED: DATABASE SETTINGS
# --------------------------------------------
DB_CONNECTION=mysql
DB_HOST=127.0.0.1
DB_DATABASE=snipeit
DB_USERNAME=snipeituser
DB_PASSWORD=type_password_here
DB_PREFIX=null
DB_DUMP_PATH='/usr/bin'
DB_CHARSET=utf8mb4
DB_COLLATION=utf8mb4_unicode_ci

# --------------------------------------------
# OPTIONAL: SSL DATABASE SETTINGS
Save the file and exit.
Then go back to the Snipe-IT root directory and update all the packages via Composer.
cd /var/www/snipeit
sudo composer install --no-dev --prefer-source
apt-get install php7.2-ldap
service apache2 restart
From the Snipe-IT directory, run the following commands:
sudo php artisan key:generate
It should ask you for an application key and display it.
**************************************
*     Application In Production!     *
**************************************

 Do you really wish to run this command? (yes/no) [no]:
 > yes

Application key [base64:6KnX/HGkNNcUGw2uucxBKT8+OwQ58yBp7vfa7sfwpDg=] set successfully.
Because you are running the web server as root, you should make sure that newly created files belong to the www-data user and group .
To do that, run the following commands:
sudo chown -R www-data:www-data /var/www/snipeit/
sudo chmod -R 755 /var/www/snipeit/
Step 6: Configure Apache2
Finally, configure the Apache2 site configuration file for Snipe-IT. This file will control how users access the Snipe-IT content. Run the following commands to create a new configuration file namedsnipeit.conf
sudo nano /etc/apache2/sites-available/snipeit.conf
Then copy and paste the following content into the file and save it. Replace the highlighted line with your own domain name and your directory root location.
<VirtualHost *:80>
     ServerAdmin admin@example.com
     DocumentRoot /var/www/snipeit/public
     ServerName example.com
     ServerAlias www.example.com

     <Directory /var/www/snipeit/public/>
        Options +FollowSymlinks
        AllowOverride All
        Require all granted
     </Directory>

     ErrorLog ${APACHE_LOG_DIR}/error.log
     CustomLog ${APACHE_LOG_DIR}/access.log combined

</VirtualHost>
Save the file and exit.
Step 7: Enable Snipe-IT and the Rewrite Module
After configuring the VirtualHost above, enable it by running the following commands.
sudo a2ensite snipeit.conf
sudo a2enmod rewrite
sudo systemctl restart apache2.service
Then open your browser and browse to the server domain name or hostname. This is usually localhost, but it can be a hostname or an IP address. Your server administrator or hosting company will have this information.
http://example.com/
Continue through the installation wizard, verify that all the requirements are met, and proceed.
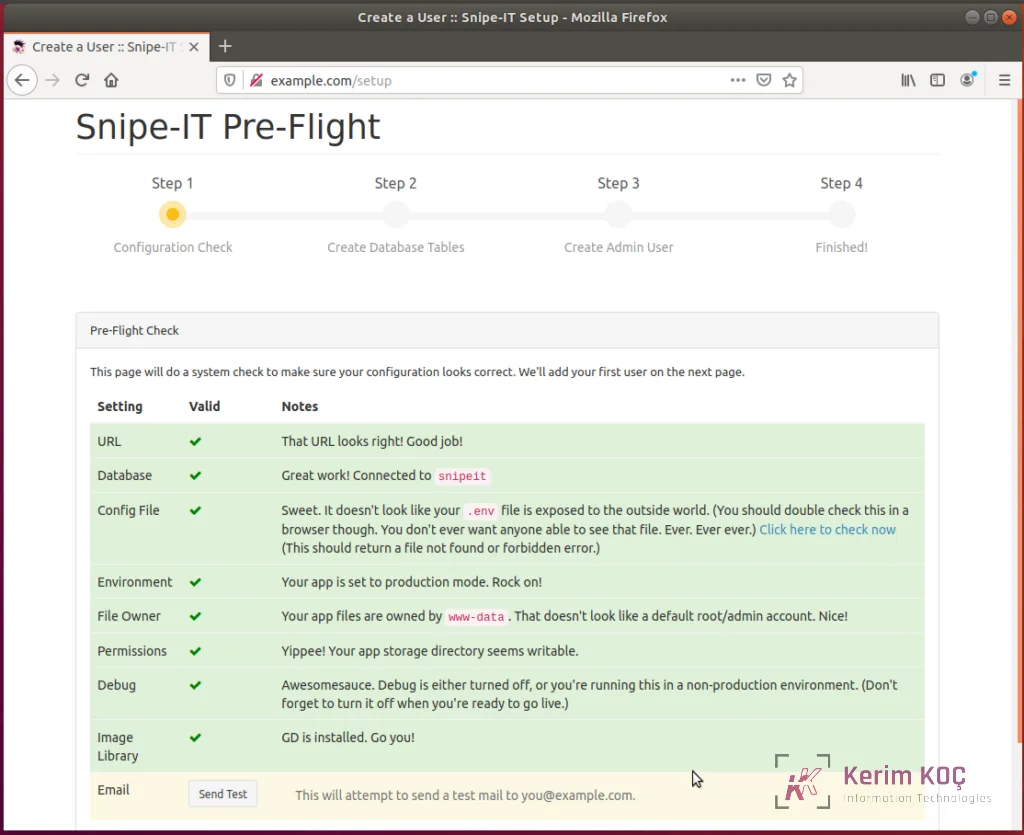
Then create a system administrator account to manage the platform.
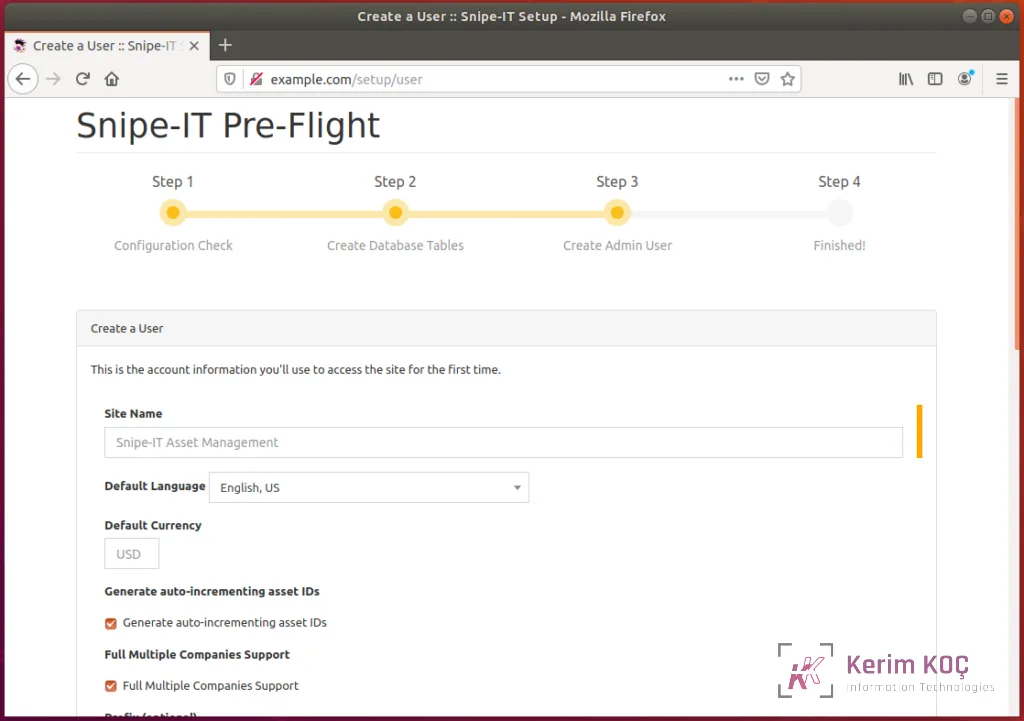
After installing, log in and start managing your IT assets.