Kerim Koç
Contents
- Installation
- Step 1: Boot menu
- Step 2: Choosing the system language
- Step 3: License Agreement
- Step 4: Creating a user account
- Step 5: Time zone
- Step 6: Disk configuration
- Step 7: Installation
- Step 8: Restart
- Step 9: Meet Grub!
- Step 10: Logging in
- Final: Congratulations! You have completed the installation successfully.
In this article we will cover installing Linux Deepin. First, make sure your system meets the following minimum requirements.
Processor: Intel Pentium IV 2GHz
System memory: 2GB (4GB recommended)
Disk space: 16GB (20GB recommended)
If your system meets the minimum requirements, we can move on to the pre-installation steps.
- To begin with, we need the latest installation image. (This guide is based on version 15.8, the latest at the time of writing, but the installation steps also apply to newer versions. You can reach the latest version using the Download menu.)
- Once the download is complete, all that remains is to create a bootable USB drive with the installation image. If you have access to Windows, you can use Rufus or Etcher, which works on all platforms. If you prefer the more traditional option of creating an installation DVD, you simply need to burn the disc image to a blank DVD.
- After completing this stage, boot your computer from the USB drive/DVD you just created and continue the installation with the steps below. The key or key combination you need to use to select the boot media varies depending on your hardware. If you do not know how to reach the BIOS/EFI screen, you can try one of the most commonly used keys:
Esc,Del,F2orF12! If you are doing a UEFI/EFI installation, make sure to select Linux Deepin UEFI or a similar option among the boot media options.
Installation
Step 1: Boot menu
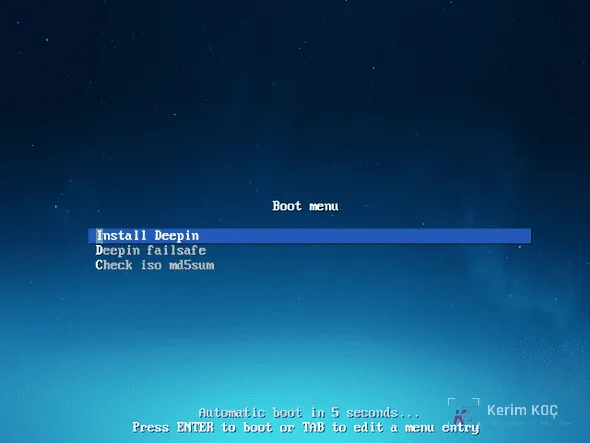
On this first screen, you can use the Install Deepin option to continue with the installation, or the Deepin Failsafe option to try the operating system without installing it. We also have access to the Check iso md5sum option to verify the integrity of the installation media. You can use this option if you are not sure about the integrity of the file or want to be certain. To proceed with the installation, we continue with Install Deepin.
Step 2: Choosing the system language
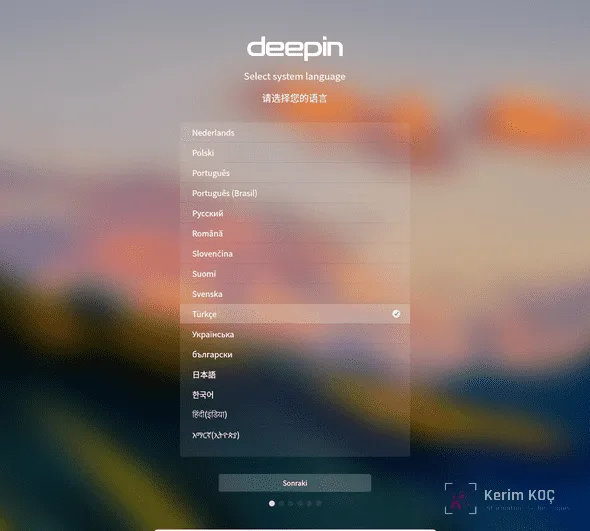
In this step we choose the installation language. I selected Türkçe and continued with Next. It is also possible to change the system language after installation.
Step 3: License Agreement
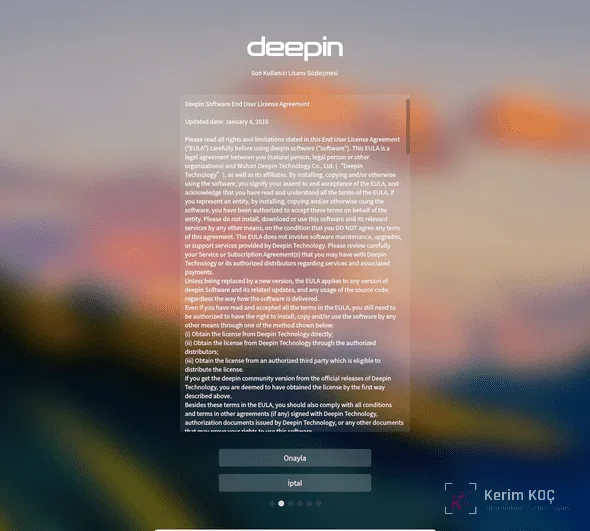
In this step, we read and accept the End User License Agreement, which was recently added to the installation stage. It is worth reminding you that you cannot continue with the installation if you do not accept the agreement.
Step 4: Creating a user account
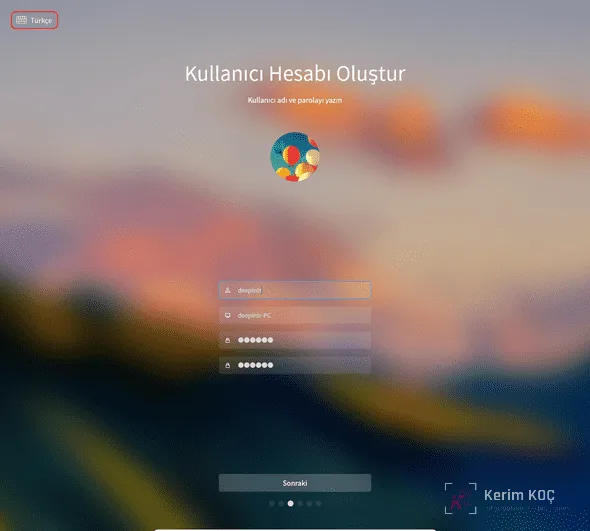
In this step, we create a new user by entering our user and computer information. Also do not forget to set the keyboard layout using the button in the top-left corner!
Step 5: Time zone
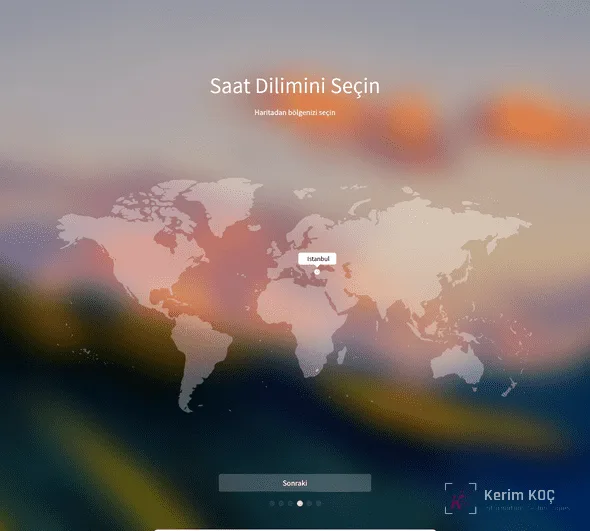
In this step we choose the time zone. If the currently selected time zone does not reflect your location, you can select your time zone by clicking the relevant location on the world map.
Step 6: Disk configuration
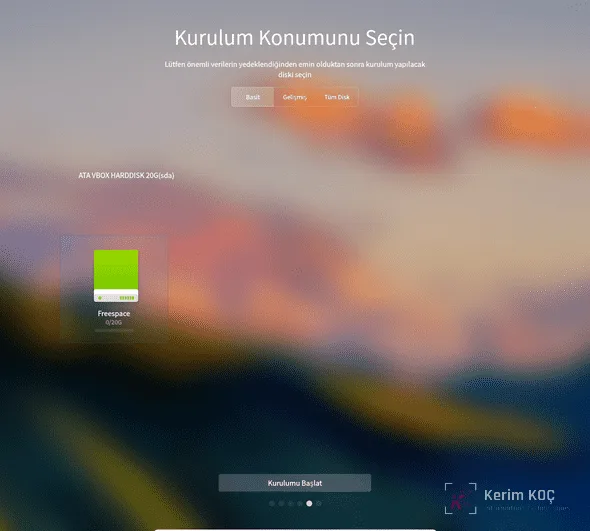
In this step, perhaps the only stage of the installation that needs explanation, we decide how Deepin will use the disk. We have 3 options in total: Simple, Advanced and Full Disk. Let's go through the options one by one.
Simple:
The Simple option lists all the partitions on your disk and lets you choose one of them. Since I am installing on a virtual machine with a clean virtual disk attached, only a single option representing the whole disk appears. If you want to continue with the Simple option, you can choose one of the free areas on your disk and continue. Dual boot users can create an empty partition on their disks from within Windows before installation, and select that partition on this screen during installation. Another thing you should know about this mode is that the partition you select is formatted as ext4 and mounted at /, which is the only mount point required to install Deepin.
Advanced:
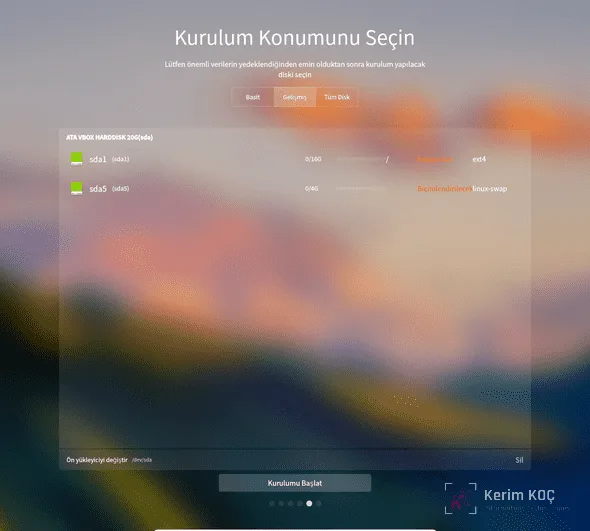
As the name suggests, in this mode you can configure the disk however you like. Adding new partitions, deleting existing ones and creating swap space are among the operations you can perform. So it is worth being careful. Again, dual boot users can create a new partition for Deepin without touching the Windows partition and continue with the installation.
In this case, as you can see in the image, I created a root / partition and a swap partition to install the system. Their configurations are as follows:
Installation partition: Mount point: / – File system: ext4
Swap partition: Mount point: (Automatic, no need to select) – File system: Swap partition
Although a swap partition is not mandatory, it is worth using when system memory is low. The generally accepted approach for the swap partition size is at least the size of system memory, or twice the size of system memory. Since I allocated 4GB of RAM to the virtual machine, I decided to create a 4GB swap partition.
Note: If you are doing a UEFI/EFI installation and using the advanced mode for your disk configuration, you need to create an efi partition of at least 300 MB (512 MB recommended) at this stage. In the Simple and Full Disk modes this happens automatically, so you do not need to do anything extra. In this case, since I am doing a BIOS installation, I am not creating an efi partition.
Full disk:
In this mode you give Deepin full authority over how to use the disk! If you continue the installation by selecting this mode, your disk will be completely formatted and configured only to install/use Deepin. For this reason, extra care is recommended. If you continue with the Full disk option, Deepin will first create a / partition to install the system, a /home partition for user files, and an /opt partition for third-party applications/packages. The advantage of this configuration is that if you need to reinstall later, you can do a clean install only on the / partition and pick up where you left off without any change to your user files and applications. You can also do the same thing using the advanced option.
Another option offered by the Full disk mode is disk encryption. If you confirm the Encrypt the Entire Disk option shown at the bottom of the screen, you will be asked to create a password for your disk on the next screen. If you are going to use the disk encryption feature, it is worth keeping this password in a safe place, because you will need to use it for every operation that requires disk access, including logging in! (For detailed information about full disk encryption, you can check out this article.)
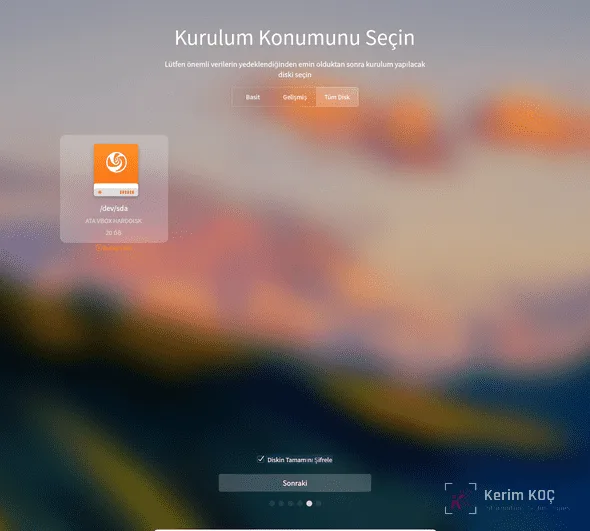
After reviewing the disk configuration options, I am continuing the installation in Advanced mode with the configuration I described above: a / (root) partition and a swap partition.
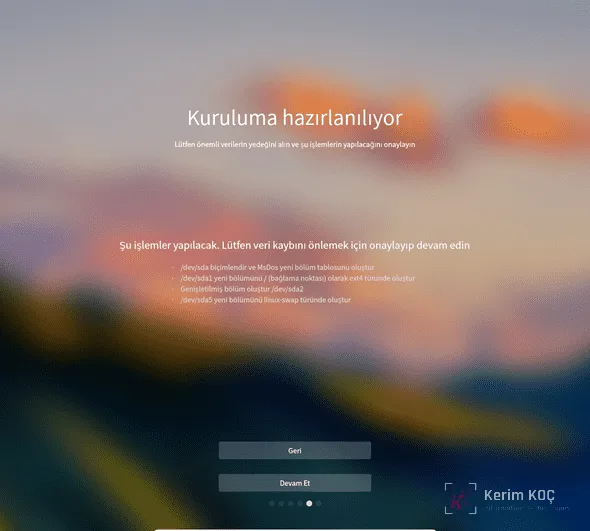
After deciding on your disk configuration and clicking the Next button, you will see the screen below. At this stage, Deepin informs you one last time about the changes it is about to make. If you are sure everything looks good, you can proceed with the installation using the Continue option, or click the Back button to edit your disk configuration.
Step 7: Installation
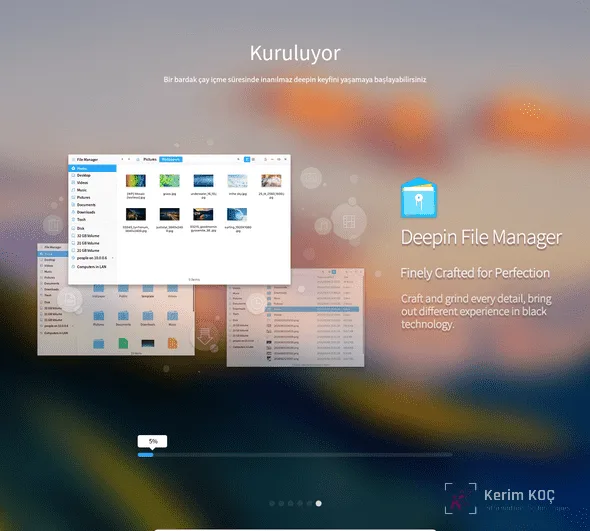
In this step the installation has begun. Depending on your system configuration, the installation takes between 15 and 20 minutes.
Step 8: Restart
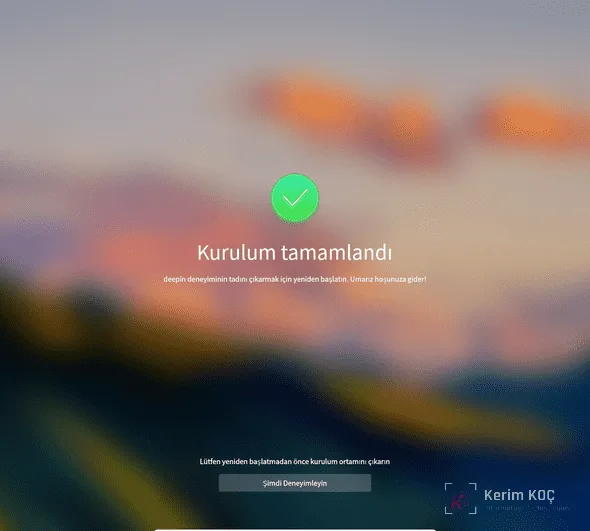
When the installation is complete, we see the screen below. Simply remove the installation media (USB drive) and continue with the Experience Now button.
Step 9: Meet Grub!
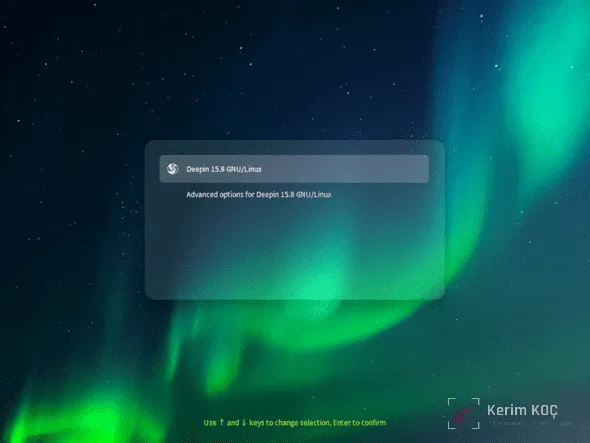
After the installation is complete and your system restarts, we meet Grub, the bootloader that comes with Deepin (and many other distributions). We continue by selecting Deepin GNU/Linux from the list.
Step 10: Logging in
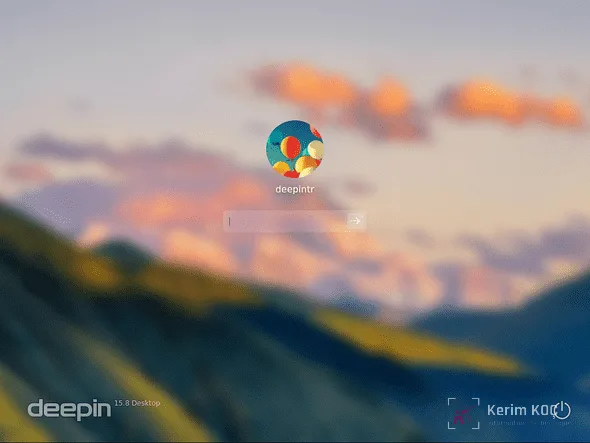
On this screen, to log in to Deepin for the first time, we enter the password we set during installation and press Enter.
Final: Congratulations! You have completed the installation successfully.
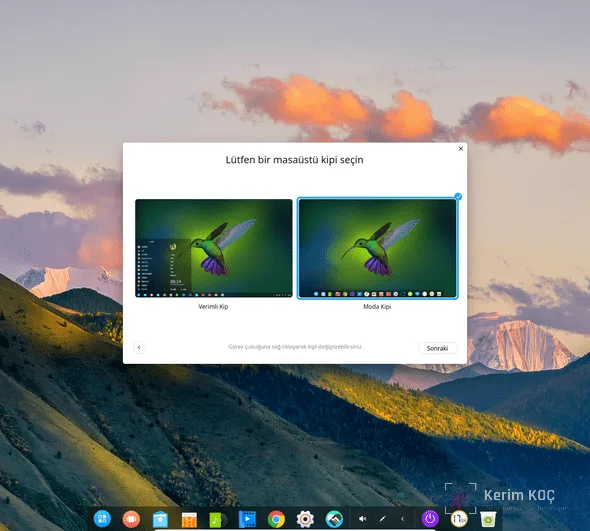
When you log in for the first time, you are greeted with a quick configuration screen like the one below. After making customization settings such as the theme, window effects and icon theme with this helper application, you can start enjoying Deepin! It is also worth installing system updates, if any.