 Kerim Koç

Contents
- Step 1: Install and configure the Bind DNS server
- Option 1: Using the Bind DNS server
- Option 2: Using Dnsmasq as your DNS server
- Step 2: Install the dependency packages
- Step 3: Download Zimbra Collaboration Open Source Edition
- Step 4: Install Zimbra Collaboration on Ubuntu 20.04/18.04/16.04
- Step 5: Access the Zimbra Admin Dashboard
To use this guide, you must have the following;
- An Ubuntu 20.04/18.04/16.04 server installed
- SSH access to the server – a user with sudo privileges
- A DNS server – a Dnsmasq or Bind DNS server in good working order
The recommended system requirements for a Zimbra server supporting up to 50 users are:
- Depending on your available resources, 4 vCPU or more
- 8 GB RAM or more
- 50 GB of available disk space
- A DNS server
In this setup, we will use the following DNS information for the Zimbra 9 installation.
| FQDN | DNS Record Type | Value |
| zimbra.kockerim.com | A | 192.168.100.10 |
| kockerim.com | MX | zimbra.kockerim.com |
Follow the steps below to install and configure the Zimbra Collaboration server on Ubuntu 20.04/18.04/16.04.
Step 1: Install and configure the Bind DNS server
Zimbra requires A and MX records to be configured on your DNS server. If you do not have a working DNS server, we have simplified the process of setting one up using Bind. The process is written as a script for ease of use.
Update your system before performing any other operation.
# Ubuntu
sudo apt update && sudo apt -y full-upgrade
[ -f /var/run/reboot-required ] && sudo reboot -f
Also install git, which is required to download the installation automation scripts
sudo apt install git -yOption 1: Using the Bind DNS server
We have bash scripts in a Github repository that you can use to configure the Bind DNS server. Use git to clone the repository to your system.
cd ~/
git clone https://github.com/jmutai/scripts.git
Go to the scripts / zimbra folder.
cd scripts/zimbra/Run the script called zimbra_bind_setup_ubuntu.sh to configure the Bind DNS server on your system.
$ ./zimbra_bind_setup_ubuntu.shPress the <Enter> key to start the installation and configuration
Internet connectivity is required for packages installation...

Press key enter to continue <Enter>
Enter your Zimbra server domain, the short version of the hostname, and the IP address. These details are used to configure the DNS server.
Input Zimbra Base Domain. E.g example.com : kockerim.com
Input Zimbra Mail Server hostname (first part of FQDN). E.g mail : zimbra
Input Zimbra Server IP Address : 192.168.100.10
Test that the DNS server is working
$ dig A zimbra.kockerim.com @127.0.0.1 +short
192.168.100.10

$ dig MX kockerim.com @127.0.0.1 +short
zimbra.kockerim.com.
You can now use the configured DNS server in your Zimbra installation – the only configuration required for the installation is the A and MX records.
Option 2: Using Dnsmasq as your DNS server
Set the Zimbra domain name, the DNS server forwarder and the MX records.
$ sudo nano /etc/dnsmasq.conf
server=8.8.8.8
listen-address=127.0.0.1
domain=example.com   # Define domain
mx-host=example.com,mail.example.com,0  # Set MX record for the domain, preference is 0
address=/mail.example.com/192.168.100.10 # Send example.com to 192.168.100.10
Set the server hostname:
sudo hostnamectl set-hostname mail.example.comAdd the server name and IP address to the /etc/hosts file.
$ sudo nano /etc/hosts
192.168.100.10 mail.example.com
Restart the dnsmasq service and test it.
sudo systemctl restart dnsmasqQuery the A record of the Zimbra server.
$ dig A zimbra.kockerim.com
 ; <<>> DiG 9.11.3-1ubuntu1.3-Ubuntu <<>> A zimbra.kockerim.com @127.0.0.1
 ;; global options: +cmd
 ;; Got answer:
 ;; ->>HEADER<<- opcode: QUERY, status: NOERROR, id: 14888
 ;; flags: qr aa rd ra; QUERY: 1, ANSWER: 1, AUTHORITY: 0, ADDITIONAL: 1
 ;; OPT PSEUDOSECTION:
 ; EDNS: version: 0, flags:; udp: 4096
 ;; QUESTION SECTION:
 ;zimbra.kockerim.com.    IN  A
 ;; ANSWER SECTION:
 zimbra.kockerim.com. 0    IN  A   192.168.100.10
 ;; Query time: 0 msec
 ;; SERVER: 127.0.0.1#53(127.0.0.1)
 ;; WHEN: Mon Apr 01 21:58:39 CEST 2019
 ;; MSG SIZE  rcvd: 73
Also, query the MX record of your domain. It should return the Zimbra server IP address.
$ dig MX kockerim.com
 ; <<>> DiG 9.11.3-1ubuntu1.3-Ubuntu <<>> MX zimbra.kockerim.com @127.0.0.1
 ;; global options: +cmd
 ;; Got answer:
 ;; ->>HEADER<<- opcode: QUERY, status: NOERROR, id: 25343
 ;; flags: qr aa rd ra ad; QUERY: 1, ANSWER: 1, AUTHORITY: 0, ADDITIONAL: 2
 ;; OPT PSEUDOSECTION:
 ; EDNS: version: 0, flags:; udp: 4096
 ;; QUESTION SECTION:
 ;zimbra.kockerim.com.    IN  MX
 ;; ANSWER SECTION:
 zimbra.kockerim.com. 0    IN  MX  0 zimbra.kockerim.com.
 ;; ADDITIONAL SECTION:
 zimbra.kockerim.com. 0    IN  A   192.168.100.10
 ;; SERVER: 127.0.0.1#53(127.0.0.1)
 ;; WHEN: Mon Apr 01 21:59:40 CEST 2019
 ;; MSG SIZE  rcvd: 117
Now that we have both the A record and the MX record, let us start installing Zimbra 8.8 on Ubuntu 20.04/18.04/16.04.
Step 2: Install the dependency packages
Make sure git is installed.
sudo apt install gitClone the repository scripts from the Github repository
cd ~
git clone https://github.com/jmutai/scripts.git
Enter the directory and install the required dependency packages.
cd scripts/zimbra/
./zimbra_bind_setup_ubuntu.sh
Enter the server's Zimbra domain, hostname (short version) and IP address.
Input Zimbra Base Domain. E.g example.com : kockerim.com
Input Zimbra Mail Server hostname (first part of FQDN). E.g mail : zimbra
Input Zimbra Server IP Address : 192.168.100.10
Step 3: Download Zimbra Collaboration Open Source Edition
As of this writing, the latest version of Zimbra is 8.8.15 . Let us download the file to our local server.
# Ubuntu 20.04
cd ~/
wget https://files.zimbra.com/downloads/8.8.15_GA/zcs-8.8.15_GA_4179.UBUNTU20_64.20211118033954.tgz

# Ubuntu 18.04
cd ~/
wget https://files.zimbra.com/downloads/8.8.15_GA/zcs-8.8.15_GA_3869.UBUNTU18_64.20190918004220.tgz

# Ubuntu 16.04
cd ~/
wget https://files.zimbra.com/downloads/8.8.15_GA/zcs-8.8.15_GA_3869.UBUNTU16_64.20190918004220.tgz
After downloading the file, extract it.
tar xvf zcs-8.8.15_GA_*.tgzChange into the zcs- * directory,
cd zcs*/Step 4: Install Zimbra Collaboration on Ubuntu 20.04/18.04/16.04
We are ready to start the installation of Zimbra Collaboration Open Source Edition on Ubuntu 20.04/18.04/16.04.
Run the installer script – this is an all-in-one server installation.
$ sudo ./install.sh
Operations logged to /tmp/install.log.DM7y8xw8
Checking for existing installation...
    zimbra-drive...NOT FOUND
    zimbra-imapd...NOT FOUND
    zimbra-patch...NOT FOUND
    zimbra-mta-patch...NOT FOUND
    zimbra-proxy-patch...NOT FOUND
    zimbra-license-tools...NOT FOUND
    zimbra-license-extension...NOT FOUND
    zimbra-network-store...NOT FOUND
    zimbra-network-modules-ng...NOT FOUND
    zimbra-chat...NOT FOUND
    zimbra-talk...NOT FOUND
    zimbra-ldap...NOT FOUND
    zimbra-logger...NOT FOUND
    zimbra-mta...NOT FOUND
    zimbra-dnscache...NOT FOUND
    zimbra-snmp...NOT FOUND
    zimbra-store...NOT FOUND
    zimbra-apache...NOT FOUND
    zimbra-spell...NOT FOUND
    zimbra-convertd...NOT FOUND
    zimbra-memcached...NOT FOUND
    zimbra-proxy...NOT FOUND
    zimbra-archiving...NOT FOUND
    zimbra-core...NOT FOUND
----------------------------------------------------------------------
PLEASE READ THIS AGREEMENT CAREFULLY BEFORE USING THE SOFTWARE.
SYNACOR, INC. ("SYNACOR") WILL ONLY LICENSE THIS SOFTWARE TO YOU IF YOU
FIRST ACCEPT THE TERMS OF THIS AGREEMENT. BY DOWNLOADING OR INSTALLING
THE SOFTWARE, OR USING THE PRODUCT, YOU ARE CONSENTING TO BE BOUND BY
THIS AGREEMENT. IF YOU DO NOT AGREE TO ALL OF THE TERMS OF THIS
AGREEMENT, THEN DO NOT DOWNLOAD, INSTALL OR USE THE PRODUCT.

License Terms for this Zimbra Collaboration Suite Software:
https://www.zimbra.com/license/zimbra-public-eula-2-6.html
----------------------------------------------------------------------
1. Type “ Y ” to accept the license terms and start the installation.
Do you agree with the terms of the software license agreement? [N] Y2.Agree to use the Zimbra package repository.
Use Zimbra's package repository [Y] Y
Warning: apt-key output should not be parsed (stdout is not a terminal)
Importing Zimbra GPG key
Configuring package repository
Checking for installable packages
Found zimbra-core (local)
Found zimbra-ldap (local)
Found zimbra-logger (local)
Found zimbra-mta (local)
Found zimbra-dnscache (local)
Found zimbra-snmp (local)
Found zimbra-store (local)
Found zimbra-apache (local)
Found zimbra-spell (local)
Found zimbra-memcached (repo)
Found zimbra-proxy (local)
Found zimbra-drive (repo)
Found zimbra-imapd (local)
Found zimbra-patch (repo)
Found zimbra-mta-patch (repo)
Found zimbra-proxy-patch (repo)3.Select the packages to install
Install zimbra-ldap [Y]
Install zimbra-logger [Y]
Install zimbra-mta [Y]
Install zimbra-dnscache [Y] N
Install zimbra-snmp [Y]
Install zimbra-store [Y]
Install zimbra-apache [Y]
Install zimbra-spell [Y]
Install zimbra-memcached [Y]
Install zimbra-proxy [Y]
Install zimbra-drive [Y]
Install zimbra-imapd (BETA - for evaluation only) [N]
Install zimbra-chat [Y]

Checking required space for zimbra-core
Checking space for zimbra-store
Checking required packages for zimbra-store
zimbra-store package check complete.

Installing:
    zimbra-core
    zimbra-ldap
    zimbra-logger
    zimbra-mta
    zimbra-dnscache
    zimbra-snmp
    zimbra-store
    zimbra-apache
    zimbra-spell
    zimbra-memcached
    zimbra-proxy
    zimbra-drive
    zimbra-patch
    zimbra-mta-patch
    zimbra-proxy-patch
zimbra-chat4.Accept the system modification.
The system will be modified. Continue? [N] YThe download and installation of the Zimbra packages will begin.
Downloading packages (12):
   zimbra-core-components
   zimbra-ldap-components
   zimbra-mta-components
   zimbra-dnscache-components
   zimbra-snmp-components
   zimbra-store-components
   zimbra-jetty-distribution
   zimbra-apache-components
   zimbra-spell-components
   zimbra-memcached
   zimbra-proxy-components
   zimbra-mta-patch
     ...done

Removing /opt/zimbra
Removing zimbra crontab entry...done.
Cleaning up zimbra init scripts...done.
Cleaning up /etc/security/limits.conf...done.

Finished removing Zimbra Collaboration Server.

Installing repo packages (12):
   zimbra-core-components
   zimbra-ldap-components
   zimbra-mta-components
   zimbra-dnscache-components
   zimbra-snmp-components
   zimbra-store-components
   zimbra-jetty-distribution
   zimbra-apache-components
   zimbra-spell-components
   zimbra-memcached
   zimbra-proxy-components
   zimbra-mta-patch
      ...
Set the administrator account password – 7>4
7) zimbra-store:                            Enabled
        +Create Admin User:                    yes
        +Admin user to create:                 admin@zimbra.kockerim.com
******* +Admin Password                        UNSET
        +Anti-virus quarantine user:           virus-quarantine.pynmkvgruh@zimbra.kockerim.com
        +Enable automated spam training:       yes
        +Spam training user:                   spam.ab7ufdyr@zimbra.kockerim.com
        +Non-spam(Ham) training user:          ham.l4s_ar23@zimbra.kockerim.com
        +SMTP host:                            zimbra.kockerim.com
        +Web server HTTP port:                 8080
        +Web server HTTPS port:                8443
        +Web server mode:                      https
        +IMAP server port:                     7143
        +IMAP server SSL port:                 7993
        +POP server port:                      7110
        +POP server SSL port:                  7995
        +Use spell check server:               yes
        +Spell server URL:                     //zimbra.kockerim.com:7780/aspell.php
        +Enable version update checks:         TRUE
        +Enable version update notifications:  TRUE
        +Version update notification email:    admin@zimbra.kockerim.com
        +Version update source email:          admin@zimbra.kockerim.com
        +Install mailstore (service webapp):   yes
        +Install UI (zimbra,zimbraAdmin webapps): yes
.....
Password for admin@zimbra.kockerim.com (min 6 characters): [8441mra12wP] MyAdminPassw0rd
Complete and apply the configuration.
Main menu
 1) Common Configuration:
    2) zimbra-ldap:                             Enabled
    3) zimbra-logger:                           Enabled
    4) zimbra-mta:                              Enabled
    5) zimbra-dnscache:                         Enabled
    6) zimbra-snmp:                             Enabled
    7) zimbra-store:                            Enabled
    8) zimbra-spell:                            Enabled
    9) zimbra-proxy:                            Enabled
   10) Default Class of Service Configuration:
    s) Save config to file
    x) Expand menu
    q) Quit
 *** CONFIGURATION COMPLETE - press 'a' to apply
 Select from menu, or press 'a' to apply config (? - help) a
 Save configuration data to a file? [Yes] <Enter>
 Save config in file: [/opt/zimbra/config.24171]
 Saving config in /opt/zimbra/config.24171…done.
 The system will be modified - continue? [No] Yes
The installation script will start configuring the Zimbra server. When it finishes, you should get output like the following.
Starting servers...done.
Installing common zimlets...
	com_zimbra_cert_manager...done.
	com_zimbra_adminversioncheck...done.
	com_zimbra_attachcontacts...done.
	com_zimbra_viewmail...done.
	com_zimbra_attachmail...done.
	com_zimbra_url...done.
	com_zimbra_webex...done.
	com_zimbra_bulkprovision...done.
	com_zimbra_proxy_config...done.
	com_zimbra_mailarchive...done.
	com_zextras_chat_open...done.
	com_zimbra_ymemoticons...done.
	com_zimbra_clientuploader...done.
	com_zimbra_date...done.
	com_zimbra_srchhighlighter...done.
	com_zimbra_tooltip...done.
	com_zextras_drive_open...done.
	com_zimbra_phone...done.
	com_zimbra_email...done.
Finished installing common zimlets.
Restarting mailboxd...done.
Creating galsync account for default domain...done.

You have the option of notifying Zimbra of your installation.
This helps us to track the uptake of the Zimbra Collaboration Server.
The only information that will be transmitted is:
	The VERSION of zcs installed (8.8.12_GA_3794_UBUNTU18_64)
	The ADMIN EMAIL ADDRESS created (admin@zimbra.kockerim.com)

Notify Zimbra of your installation? [Yes]
Checking if the NG started running...done.
Setting up zimbra crontab...done.

Moving /tmp/zmsetup.20190401-221739.log to /opt/zimbra/log
Configuration complete - press return to exit
Confirm the status of the Zimbra services.
$ sudo su - zimbra -c "zmcontrol status"
Host zimbra.kockerim.com
     amavis                  Running
     antispam                Running
     dnscache                Running
     ldap                    Running
     logger                  Running
     mailbox                 Running
     memcached               Running
     mta                     Running
     opendkim                Running
     proxy                   Running
     service webapp          Running
     snmp                    Running
     spell                   Running
     stats                   Stopped
     zimbra webapp           Running
     zimbraAdmin webapp      Running
     zimlet webapp           Running
     zmconfigd               Running
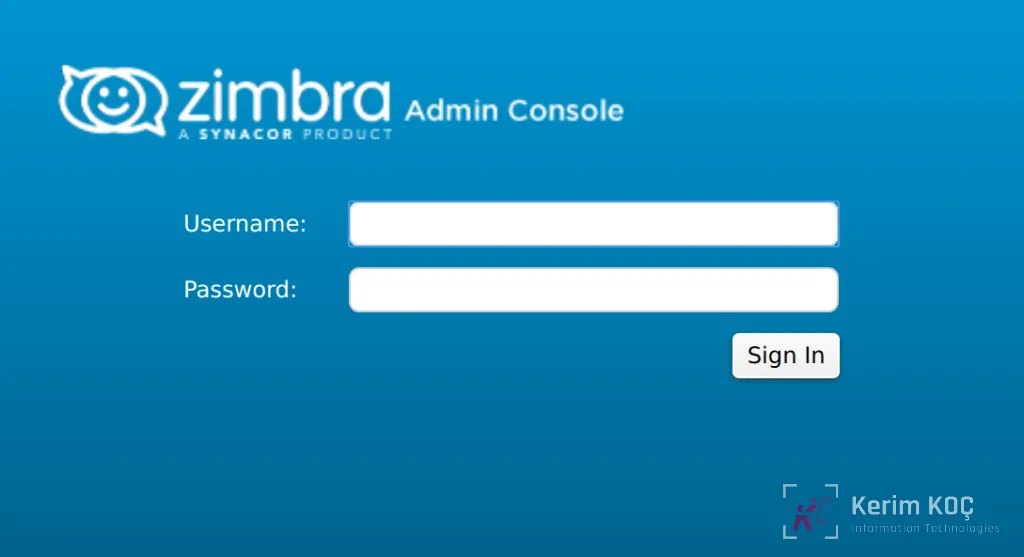
Step 5: Access the Zimbra Admin Dashboard
Access the admin interface athttps://ipaddres_or_hostname:7071
How to disable Zimbra TLSv1 – to read this post, click here.


