 Kerim Koç
Contents
What is GParted?
Disk partitioning in Linux is done using command-line programs such as fdisk. GParted (GNOME Partition Editor) is a GTK-based graphical user program that allows disk partitioning with just a button click. GParted is the official GNOME partition editing application. GParted is used to create, delete, resize, move, check and copy disk partitions and to modify file systems such as exfat, fat32/64, ext2/3/4, Linux-swap and more.
Installing GParted
You can install GParted on Ubuntu with a single command using APT.
sudo apt install gparted
You can verify whether GParted was installed successfully by using the following command, which produces output similar to the image below.
sudo apt policy gparted
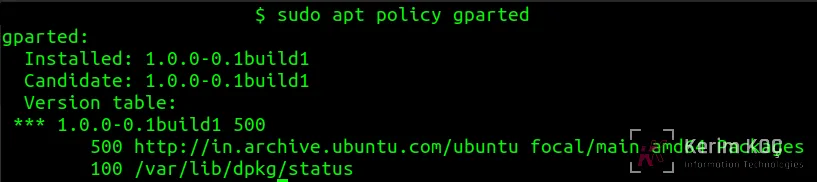
GParted installed successfully
Note: It is recommended to back up the data on the partition before using GParted.
The GParted Interface
To open GParted, go to Activities in Ubuntu and click the gparted icon. GParted requires sudo privileges, so it will ask for a password.
GParted menu
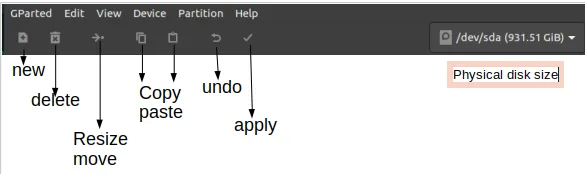
The image above shows the GParted menu. Like many programs, it has a file menu (GParted), an edit menu, a view menu, a device and partition menu, and a help menu. The icons below the menu bar represent the common operations performed by gparted.
- new – create a new partition
- delete– delete an existing partition
- resize/move – shrink (or) enlarge a partition to resize it
- copy/paste – used to copy/paste text (or) information
- undo – undo the previous action
- apply – to perform the operation selected above, you need to click the apply icon to carry out any operation selected in gparted.
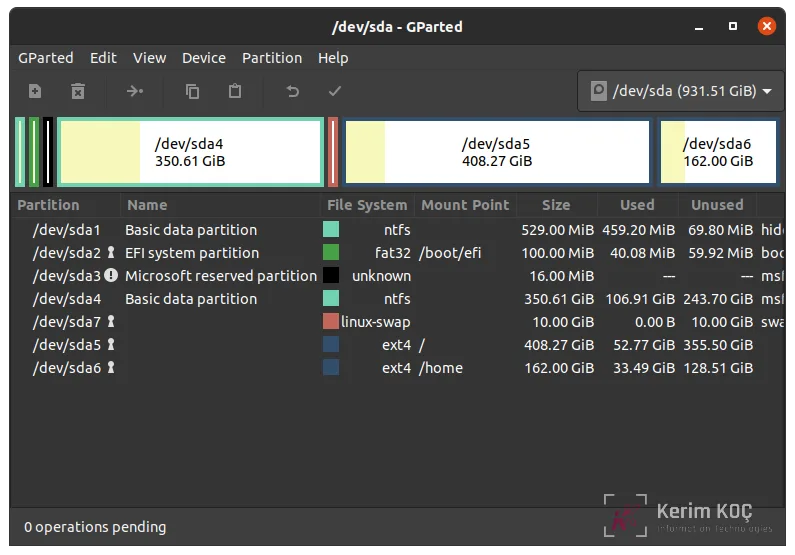
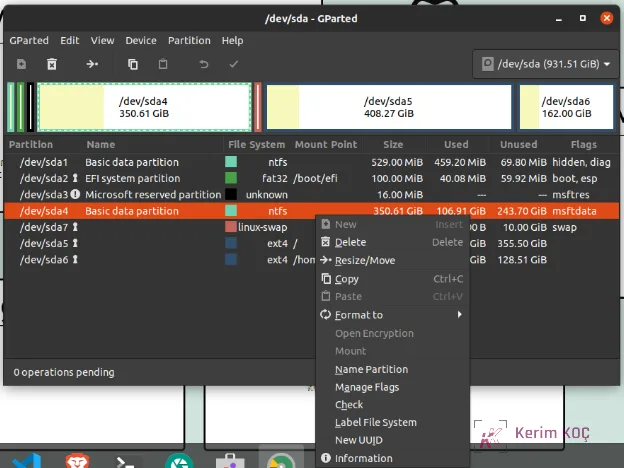
You can see all the partitions on my hard disk. It has a total of 7 partitions: /dev/sda[1-4], used for Microsoft Windows, and /dev/sda[5-7], used by my Linux distribution. The lock icon between the partition and the name indicates that these partitions cannot be modified while they are in use. Partitions can be modified by using a Live CD (or) another operating system that does not use these partitions.
GParted clearly shows us
- Partition – the logical partition ID in the partition table
- Name– the name of the partition
- File System – the type of file system used by the partition, such as ntfs, fat32, ext4, linux-swap and more.
- Mount point – the point at which the partition is mounted by the operating system, such as root(/) or home(/home)
- Size(Used/Unused) – the size of the partition and the used and free space on the partition
- Flags – Tells what the partition is used for, such as a hidden partition, a swap partition or a Windows partition.
Resizing a partition to create a new partition
Step 1: To create a new ext4 partition, we will shrink /dev/sda4 by 10 GB. Go to /dev/sda4 and right-click, and an options menu like the one below opens.
Options menu
The menu contains the following options:
- create/delete partitions
- resize and move partitions
- format partitions
- name partitions and add flags
- change the UUID and more
Partition properties: To view more information about a partition, click the information option in the menu shown in the image above.
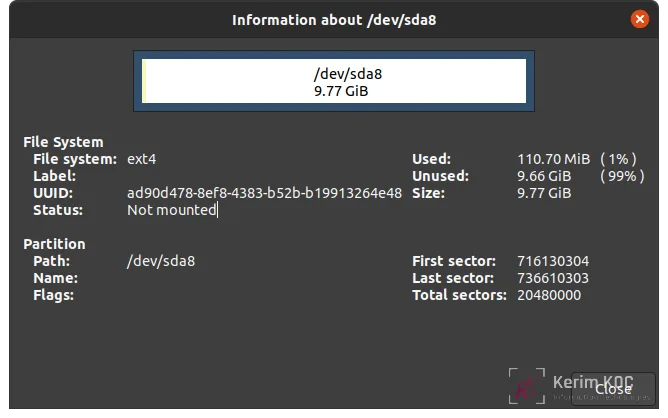
Step 2: Click Resize/Move. New windows will open for choosing the size to resize the partitions. Since we are taking the new partition size as 10 GB, add 10000 (GB converted to MiB) as Free Space in the option below. Now click Resize / Move
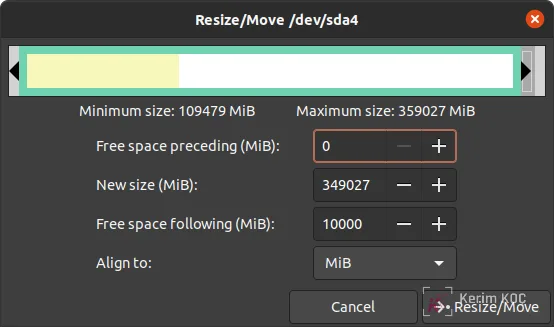
resize options
Step 3: Now click the "apply icon" in the GParted menu (it will be at the top, along with the icons representing the actions); it will ask for confirmation
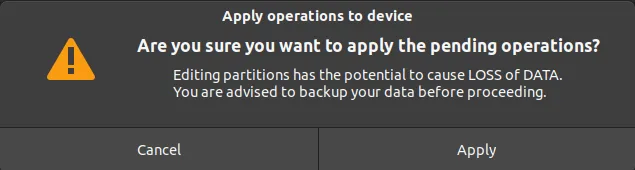
confirmation warning
After you click Apply, the partition will be resized.
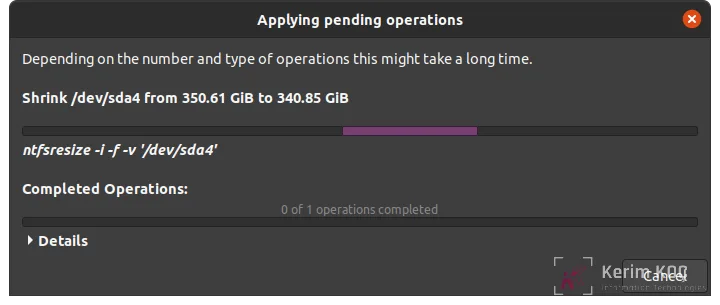
gparted will start the resize operations
Step 4: If the resize is successful, you will see a success message like the one below.
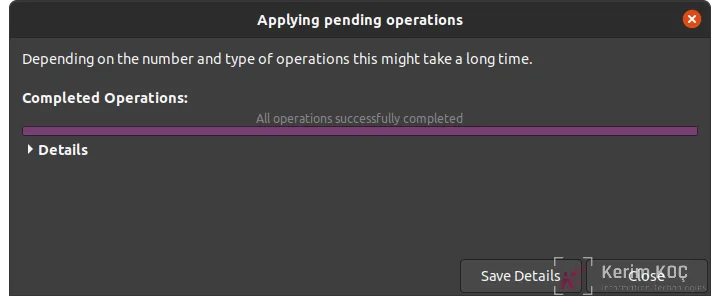
resize successful
You will see unallocated space in the GParted list
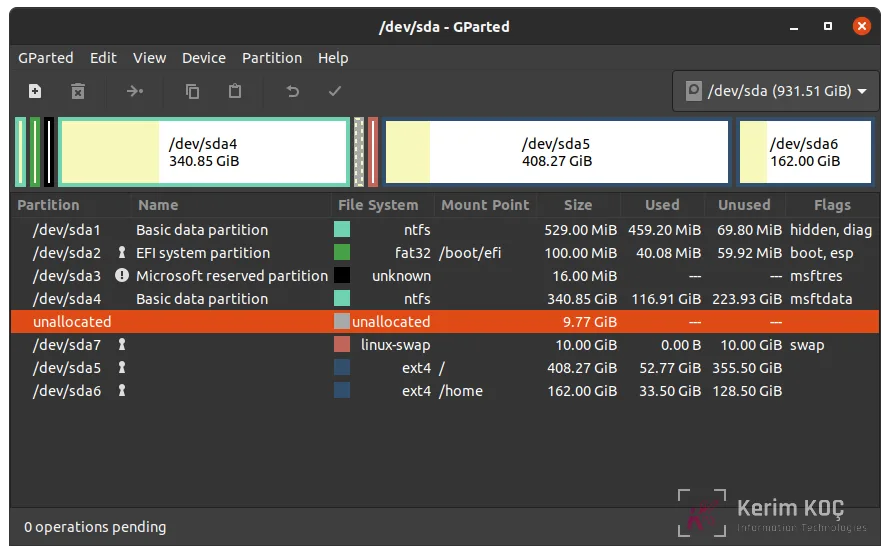
unallocated space
Creating a New Partition
Click on the unallocated space and choose new in the GParted menu, as we did with the apply icon. Choose options such as size, name and file system, and then click add.
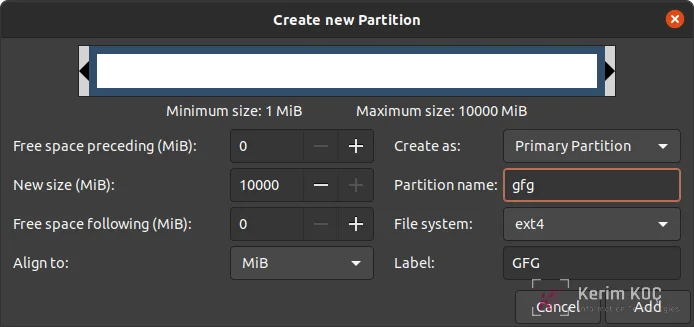
New partition option
Now click the apply icon as before to apply the changes and accept the warning.
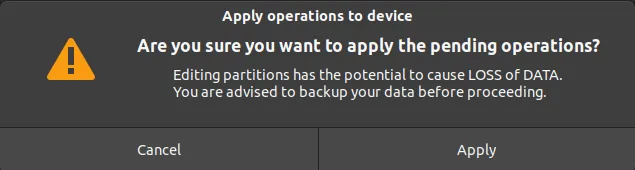
apply operations
If the operations are successful, you will see a message like before.
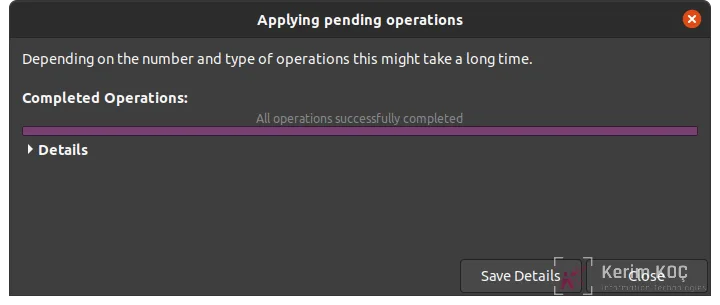
operations successful
We have successfully created a new /dev/sda8 partition using GParted
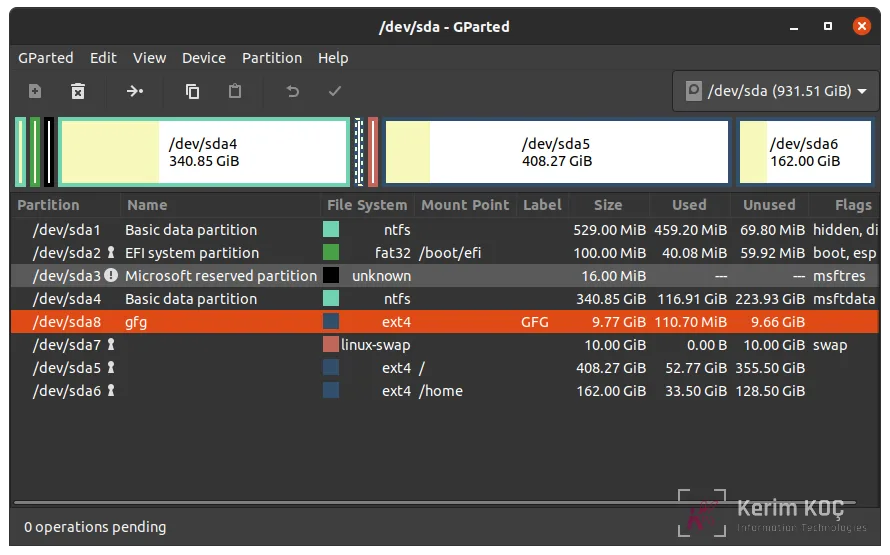
NEW Partition
Formatting a new partition
When creating a new partition, you can choose the file system format. If you choose to format an existing partition, select the partition you want to format and right-click it to open the partition menu. Then go to the format option and click the file system type you want. After selecting, simply apply the changes by clicking the apply icon in the top menu.
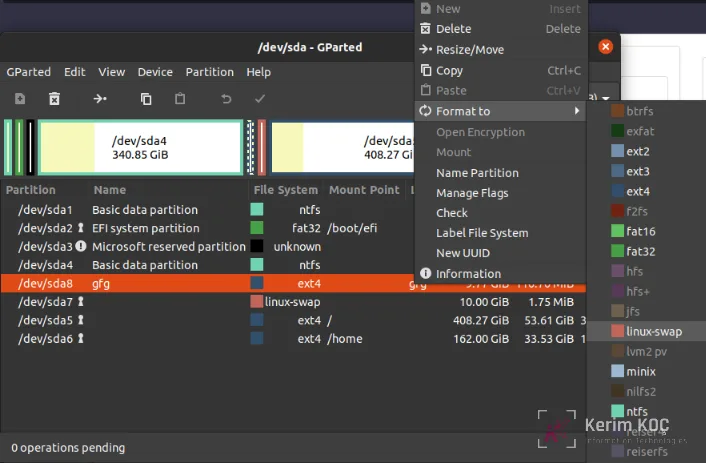
formatting a partition
Deleting a Partition
Deleting a partition is simple. Select the partition you want to delete, click the delete icon in the top menu, and then click the apply icon. Deleting a partition erases all the data on that partition, so be careful when using it.
You can also mount the Gparted application as an ISO on your server. You can download the ISO file from https://gparted.org/download.php .



