Kerim Koç
Contents
- What Is Nginx Load Balancing?
- Nginx Load Balancing Methods
- Nginx Load Balancer Environment Setup
- Install Nginx on the Load Balancer Host
- Configure Nginx as a Load Balancer
- 1. Set Up Nginx Using the Round Robin Method
- 2. Set Up Nginx Using the IP Hash Method
- 3. Set Up Nginx Using the Least Connected Method
- Test the Nginx Web Servers
What Is Nginx Load Balancing?
Nginx is one of the most popular free, open-source software packages used for web serving , caching , reverse proxying , mail proxying and load balancing . Nginx can handle thousands of concurrent connections. However, when the number of users and the traffic on your website grow quickly, you will need to put a load balancer in front of your website.
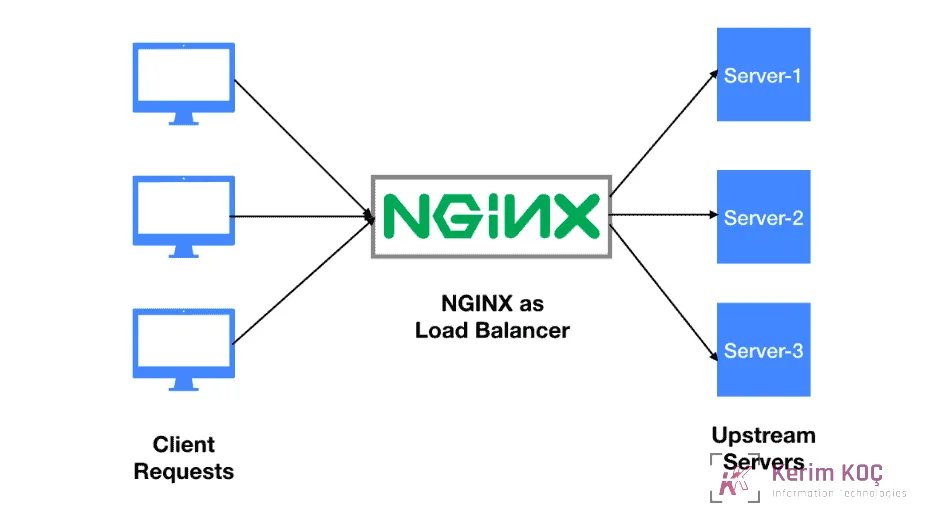
Load balancing is used when you want to scale your application and improve its performance and redundancy. Nginx is the most robust and popular load balancer, working to improve server availability and efficiency. Nginx acts as a single entry point to a distributed web application running on multiple separate servers.
Nginx load balancing lets you add or remove servers as demand requires. The Nginx load balancer distributes incoming network traffic and workload across groups of separate application servers. In each of these cases, it returns the response from the selected server to the right client.
Nginx Load Balancing Methods
- Round robin : In this method, requests are distributed in a round-robin fashion. It is used automatically when no method is specified for distribution.
- Ip hash : This is a method in which hash functions are used to determine which server will handle the next request, based on the client's IP address. With the help of this method, you can opt for session persistence.
- Least Connected : With this method, you can assign the next request to a server that is not very busy, that is, one with a small number of active connections.
Nginx Load Balancer Environment Setup
| HOST | IP ADDRESS |
| Nginx Load Balancer | 192.168.0.10 |
| First Application Server | 192.168.0.11 |
| Second Application Server | 192.168.0.12 |
In this article, we will explain how to set up Nginx as a load balancer on an Ubuntu server.
Install Nginx on the Load Balancer Host
First, you will need to install the Nginx server on the Load Balancer host. You can install it by running the following command:
apt-get install nginx -yAfter Nginx is installed, start the Nginx service and make it start when the system reboots:
systemctl start nginx
systemctl enable nginx
You can now verify the status of the Nginx service using the following command:
systemctl status nginxIf everything is fine, you will get the following output:
● nginx.service - A high performance web server and a reverse proxy server
     Loaded: loaded (/lib/systemd/system/nginx.service; enabled; vendor preset: enabled)
     Active: active (running) since Mon 2021-10-11 19:22:31 UTC; 26s ago
       Docs: man:nginx(8)
    Process: 62622 ExecStartPre=/usr/sbin/nginx -t -q -g daemon on; master_process on; (code=exited, status=0/SUCCESS)
    Process: 62623 ExecStart=/usr/sbin/nginx -g daemon on; master_process on; (code=exited, status=0/SUCCESS)
   Main PID: 62716 (nginx)
      Tasks: 2 (limit: 1041)
     Memory: 3.9M
     CGroup: /system.slice/nginx.service
             ├─62716 nginx: master process /usr/sbin/nginx -g daemon on; master_process on;
             └─62719 nginx: worker process

Oct 11 19:22:31 ubuntu systemd[1]: Starting A high performance web server and a reverse proxy server...
Oct 11 19:22:31 ubuntu systemd[1]: Started A high performance web server and a reverse proxy server.
By default, the Nginx web server listens on port 80 . You can check this by running the following command:
ss -antplIn the output below you should see Nginx on port 80 :
State     Recv-Q    Send-Q       Local Address:Port         Peer Address:Port    Process
LISTEN    0         511                0.0.0.0:80                0.0.0.0:*        users:(("nginx",pid=62719,fd=6),("nginx",pid=62716,fd=6))
LISTEN    0         4096         127.0.0.53%lo:53                0.0.0.0:*        users:(("systemd-resolve",pid=62850,fd=13))
LISTEN    0         128                0.0.0.0:22                0.0.0.0:*        users:(("sshd",pid=62835,fd=3))
LISTEN    0         511                   [::]:80                   [::]:*        users:(("nginx",pid=62719,fd=7),("nginx",pid=62716,fd=7))
LISTEN    0         128                   [::]:22                   [::]:*        users:(("sshd",pid=62835,fd=4))
Now open your web browser and verify the Nginx test page using the URL http://192.168.0.10 . You should see the Nginx test page on the following screen:

At this point your Nginx web server is installed and running. You can now move on to the next step.
Configure Nginx as a Load Balancer
Next, you will need to create an Nginx virtual host configuration file to set up load balancing. You can set up Nginx load balancing using three methods.
1. Set Up Nginx Using the Round Robin Method
To implement the load balancer, you will need to create an Nginx virtual host configuration file. You can create it with the following command:
nano /etc/nginx/conf.d/loadbalancer.confAdd the following configuration for the round robin method:
upstream backend {
        server 192.168.0.11;
        server 192.168.0.12;
    }

    server {
        listen      80;
        server_name 192.168.0.10;

        location / {
	        proxy_redirect      off;
	        proxy_set_header    X-Real-IP $remote_addr;
	        proxy_set_header    X-Forwarded-For $proxy_add_x_forwarded_for;
	        proxy_set_header    Host $http_host;
		proxy_pass http://backend;
	}
}
Here: 192.168.0.10 is the IP address of the load balancer, 192.168.0.11 is the IP address of the first backend server and 192.168.0.12 is the IP address of the second backend server.
When you are done, save and close the file, then restart the Nginx service to apply the changes:
systemctl restart nginxIn this method, requests are distributed cyclically.
2. Set Up Nginx Using the IP Hash Method
In this section we will set up Nginx load balancing using the Ip hash method. This method uses an algorithm that takes the source and destination IP addresses of the client and server to generate a unique hash key. This key is used to assign the client to a specific server.
First, create an Nginx virtual host configuration file with the following command:
nano /etc/nginx/conf.d/loadbalancer.confAdd the following configuration:
upstream backend {
	ip_hash;
        server 192.168.0.11;
        server 192.168.0.12;
    }

    server {
        listen      80;
        server_name 192.168.0.10;

        location / {
	        proxy_redirect      off;
	        proxy_set_header    X-Real-IP $remote_addr;
	        proxy_set_header    X-Forwarded-For $proxy_add_x_forwarded_for;
	        proxy_set_header    Host $http_host;
		proxy_pass http://backend;
	}
}
When you are done, save and close the file, then restart the Nginx service to apply the changes:
systemctl restart nginx3. Set Up Nginx Using the Least Connected Method
In this section we will set up Nginx load balancing using the Least Connected method. This method routes requests to the server that currently has the fewest active connections. First, create an Nginx virtual host configuration file with the following command:
nano /etc/nginx/conf.d/loadbalancer.confAdd the following configuration:
upstream backend {
        least_conn;
        server 192.168.0.11;
        server 192.168.0.12;
    }

    server {
        listen      80;
        server_name 192.168.0.10;

        location / {
	        proxy_redirect      off;
	        proxy_set_header    X-Real-IP $remote_addr;
	        proxy_set_header    X-Forwarded-For $proxy_add_x_forwarded_for;
	        proxy_set_header    Host $http_host;
		proxy_pass http://backend;
	}
}
When you are done, save and close the file, then restart the Nginx service to apply the changes:
systemctl restart nginxTest the Nginx Web Servers
After setting up Nginx load balancing using one of the three methods, you will need to check whether Nginx load balancing is working.
To test it, open your web browser and access your application server using the URL http://192.168.0.10 . You should see the page of your first application server

Now keep refreshing the page. After a while the application should load from the second server, and you should see the page of your second application server: