 Kerim Koç

Contents
- Prerequisites
- Step 0: Start the wizard
- Step 1: Select your OpenProject edition
- Step 2: PostgreSQL database configuration
- Install a new PostgreSQL server and database locally (default)
- Use an existing PostgreSQL database
- Skip (not recommended)
- Step 3: Apache2 web server
- Install Apache2 web server (default)
- Skip (not recommended)
- Step 4: SVN / Git integration server
- Step 5: Outgoing email configuration
- Sendmail (default)
- SMTP (recommended for production systems)
- Skip (not recommended)
- Step 6: Administrator email
- Step 7: Memcached server
- Result
Before proceeding with the installation, please make sure you are running on a 64-bit system. You can check this by running the uname -icommand on the target server and verifying that it outputs x86_64:
uname -i
 x86_64
Import the PGP key used to sign our packages:
wget -qO- https://dl.packager.io/srv/opf/openproject/key | sudo apt-key add -Add the OpenProject package source:
sudo wget -O /etc/apt/sources.list.d/openproject.list \
  https://dl.packager.io/srv/opf/openproject/stable/11/installer/ubuntu/18.04.repo
Download the OpenProject package:
sudo apt-get update
sudo apt-get install openproject
Initial configuration
After successfully installing the OpenProject package, you can now perform the initial configuration of OpenProject using the wizard that comes with the OpenProject package.
Prerequisites
- If you want to connect to an existing database server instead of installing a local database server, please make sure you have your database hostname, port, username and password ready. The database username used to connect to the existing database must have the CREATE DATABASE privilege.
- If you want to enable HTTPS, you will need to provide the path (on the server) to your certificate file, private key file and CA bundle file.
Step 0: Start the wizard
To start the configuration wizard, please run the following command as root or with sudo:
sudo openproject configureNotes:
- If you make a typo or need to correct a configuration option, you can always safely cancel the configuration wizard by pressing
CTRL+Cand restart it by runningsudo openproject reconfigure. - Every time you run the OpenProject wizard, your choices will be stored in a configuration file
/etc/openproject/installer.datand on subsequent runs ofsudo openproject configurethese values will be reused, and the wizard will only show the steps for options you have not been asked about yet. - If you want to run through all the wizard options again, you can do so by running
sudo openproject reconfigure. This will show all the wizard steps, but will still keep the values you entered before as defaults in the input fields. You can skip the dialogs you do not want to change by confirming them withENTER.
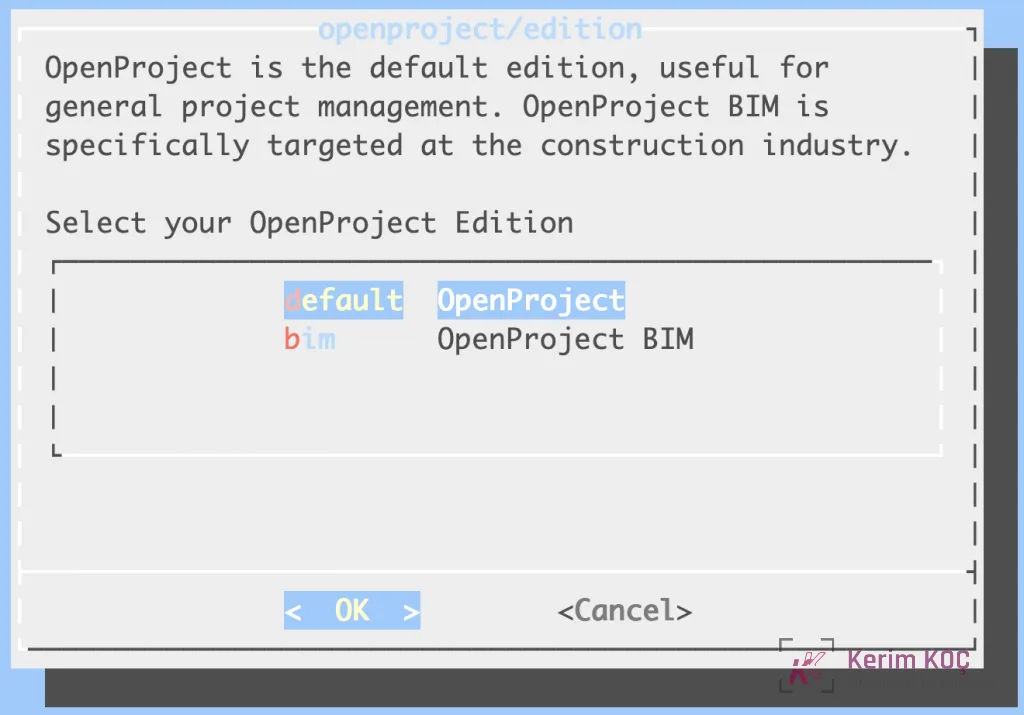
Step 1: Select your OpenProject edition
OpenProject comes in two editions:
- the default edition, aimed at general project management.
- the BIM edition, aimed specifically at the construction industry.
Step 2: PostgreSQL database configuration
OpenProject requires a PostgreSQL database to store your data. This wizard step lets you select an option for the PostgreSQL database connection:
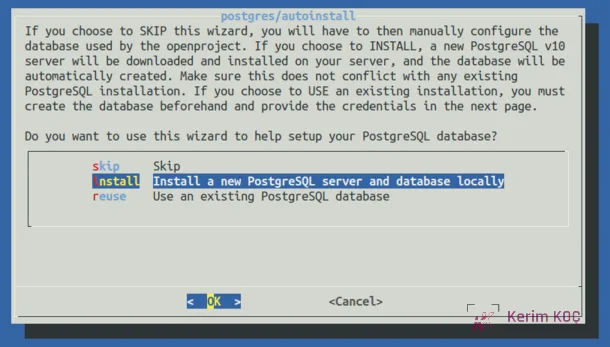
The dialog lets you choose one of three options:
Install a new PostgreSQL server and database locally (default)
Choose this option if you want OpenProject to install and configure a local database server for you, rather than doing it manually. This is the best choice if you are not familiar with managing databases or do not have a separate PostgreSQL database server you want to connect to.
Use an existing PostgreSQL database
Choose this option if you have a PostgreSQL database server installed on the host where the OpenProject package is installed, or on another server that you can connect to from this machine.
In this case, the wizard will show you several additional steps in which you enter the hostname, username and password, as well as the database name for the PostgreSQL database.
Skip (not recommended)
The wizard will not try to connect to any database. You will need to specify a database manually through the DATABASE_URLenvironment variable. If you choose to skip and have not set a DATABASE_URL, the configuration process will fail.
You can set the DATABASE_URLparameter yourself to a PostgreSQL database URL.
sudo openproject config:set DATABASE_URL="postgresql://[user[:password]@][host][:port][/dbname][?param1=value1&...]Step 3: Apache2 web server
OpenProject comes with a built-in Ruby application server, but this server only listens on a local interface. To receive connections from the outside world, it needs a web server that will act as a proxy to forward incoming connections to the OpenProject application server.
This wizard step lets you automatically set up an Apache2 web server to act as that proxy.
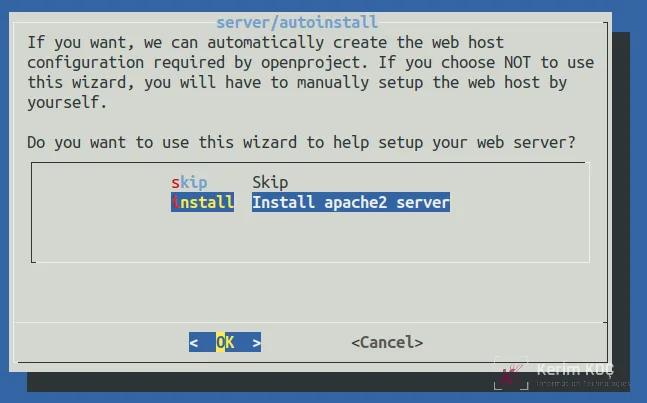
The available options are:
Install Apache2 web server (default)
We recommend letting OpenProject install and configure the external web server. In this case, we will set up an Apache2 web server with a VirtualHost that listens on the domain name you specify and optionally provides SSL / TLS termination.
If you choose to install Apache2 automatically, multiple dialogs will ask for the parameters to set it up:
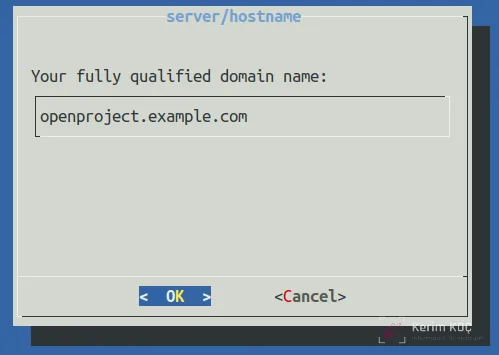
Domain name
Enter the fully qualified domain at which your OpenProject installation will be reached. This will be the ServerNameof your Apache VirtualHost and will also be used to generate full links from OpenProject, such as in emails.
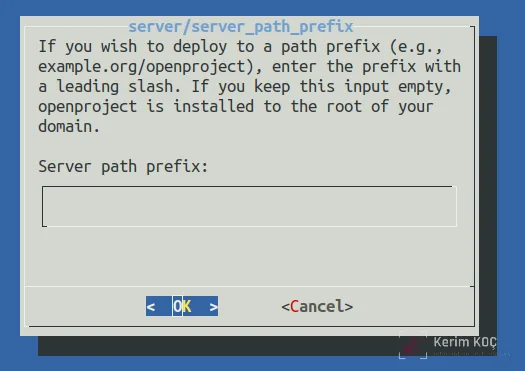
Server path prefix
If you want to install OpenProject under a server path prefix, such as yourdomain.example.com/openproject, please specify that prefix here with a leading slash. For example: /openproject. If OpenProject will respond at http(s)://yourdomain.example.comas specified in the previous dialog, leave this dialog empty and confirm by pressing ENTER.
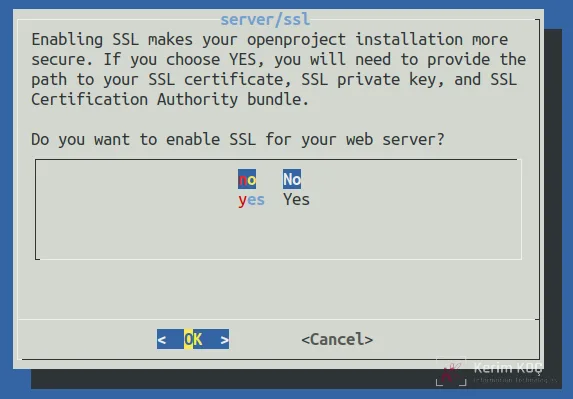
SSL / TLS configuration
OpenProject can configure Apache to support HTTPS (SSL / TLS). If you have SSL certificates and want to use SSL / TLS (recommended), select Yes .
In this case, you will be shown three additional dialogs in which to enter the certificate details:
- Absolute path to the SSL certificate
- Absolute path to the SSL private key
- Path to the Certificate Authority bundle for the certificate (optional, leave empty unless needed)
External SSL / TLS termination
If you terminate SSL externally before the request reaches the OpenProject server, you need to follow the instructions below to avoid redirect errors. If you want to use SSL on the server running OpenProject, skip this section.
If you have a separate server that terminates SSL and only forwards / proxies to the OpenProject server, you should select "No" in this dialog. However, there are some parameters you need to put into your external configuration.
- If you are proxying to the OpenProject server, you need to pass the HOST header on to the internal server. This ensures that the hostname of the external request is passed to the internal server. Otherwise, you may see redirects in your browser to the internal host on which OpenProject is running.
- In Apache2, set the
ProxyPreserveHost Ondirective - In NginX, use the following value:
proxy_set_header X-Forwarded-Host $host:$server_port;
- In Apache2, set the
- If you are terminating SSL on the external server, you need to set the
X-Forwarded-Proto httpsheader on the external server to tell OpenProject that the request is HTTPS, even if it was terminated earlier in the request.- In Apache2, use
RequestHeader set "X-Forwarded-Proto" https - In Nginx, use
proxy_set_header X-Forwarded-Proto https;
- In Apache2, use
- Finally, to tell OpenProject that it should generate links with 'https' when there is no request (for example, when sending emails), you need to make the following setting:
openproject config:set SERVER_PROTOCOL_FORCE_HTTPS="true"followed by anopenproject configure. This ensures that OpenProject responds correctly with secure cookies even if https is not configured in the server configuration.
Skip (not recommended)
The installer will not set up an external web server for access. You will need to install and set up a web server such as Apache2 or Nginx to act as the web server that proxies to our internal server listening on localhost:6000.
Choose this option only if you have installed a local Apache2 that the OpenProject package cannot control, or if you need to use a different web server such as Nginx. Please note that not all functionality (especially related to Repositories) is supported on Nginx.
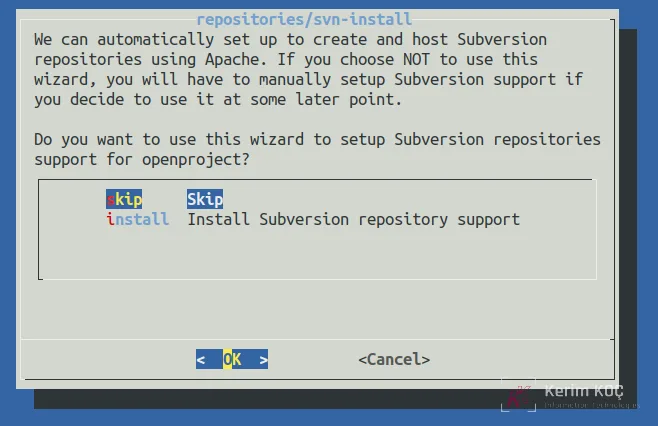
Step 4: SVN / Git integration server
If you chose to install an Apache2 web server automatically, you will be asked whether you want to set up Git and Subversion repository support. If you do not need it or are in doubt, select Skip for both options.
Step 5: Outgoing email configuration
OpenProject requires a setup for sending outgoing emails for notifications such as updates to work packages, password resets or other notifications that you and your users receive.
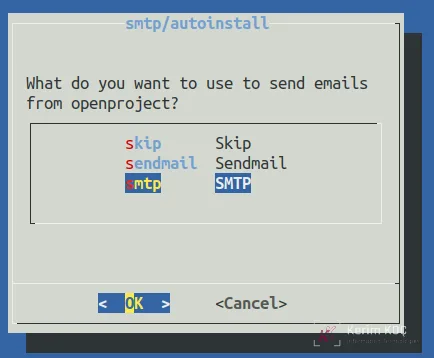
The wizard supports the following options:
Sendmail (default)
Uses a local sendmail installation, or just installs a local postfix MTA if you do not have sendmail.
This is the easiest setup because it does not require an SMTP configuration, but depending on your mail accounts or firewall setup, your emails may not be delivered consistently.
SMTP (recommended for production systems)
Lets it connect to an SMTP server using the authentication types NONE, PLAIN, LOGINor CRAM-MD5. Use this if you have a dedicated mail account that you will use to deliver OpenProject mail, or if sendmail does not work because of your local firewall / mail relay setup.
Skip (not recommended)
Does not set up the mail configuration. You can configure the mail setup in OpenProject by visiting openproject.example.com/settings?tab=notificationson your installation .
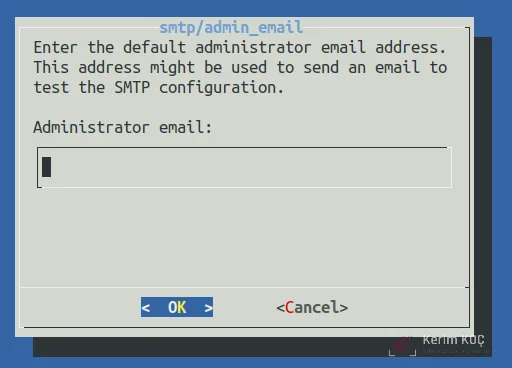
Step 6: Administrator email
The wizard will ask you for an administrator email address so that it can create the administrator account with this email for the first login. Enter your email address to be linked to the administrator account.
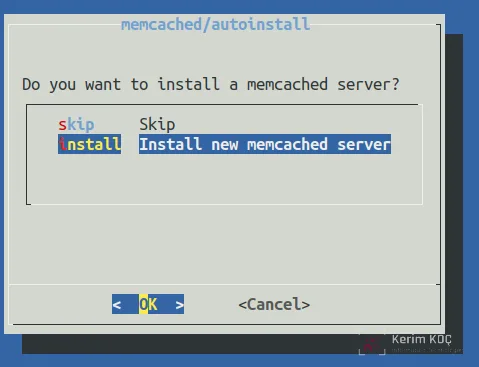
Step 7: Memcached server
OpenProject relies heavily on caching, so the wizard recommends setting up a local memcached server that OpenProject instances can connect to. You should always set this to installunless you have a reason to configure another caching mechanism, for example when configuring multiple shared instances of OpenProject .
Result
After this last step is confirmed, the OpenProject wizard will complete and apply all the configuration options you have just selected. This may take a few minutes depending on your machine and internet connection, since OpenProject may need to install additional packages (such as a web server or database) depending on your choices.
When this process completes, the internal application and web servers will have started, the background jobs for handling work-intensive tasks will be running, and the connection to the database will be established.
You should be able to access the OpenProject instance by visiting your installation at http://<openproject.example.com>/<server prefix>.
You can then log in using the default username / password combination:
- username =
admin - password =
admin
You will be asked to change this password immediately after the first login.


