 Kerim Koç

Contents
BigBlueButton is a free and open-source web conferencing software developed with a focus on educational institutions. As an HTML5-based web application, BigBlueButton supports all operating systems and platforms.
Features
BigBlueButton supports the LTI 2.0 standard and can be integrated with many different LMS platforms. Aside from the additional features that may come with an LMS and its plugins, BigBlueButton provides its users with the following core features:
- Creating classes, rooms and groups
- Teacher/student interaction on a whiteboard
- User (Teacher/Presenter/Student) permission management
- Screen sharing management
- Presenting PDFs on the digital whiteboard
- Watching educational videos on the digital whiteboard
- Publishing poll questions
Minimum server requirements:
- Ubuntu 18.04 64-bit (must run on the 4.x kernel)
- 8 GB RAM (16 GB RAM recommended)
- 4 CPU (8 CPU recommended)
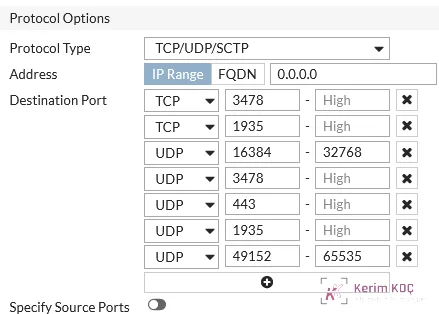
- TCP ports 80 and 443 must be open
- UDP ports 16384 – 32768 must be open
- Port 80 must not be used by another application
- A user with root or sudo privileges on the server
- SSH access
Other requirements:
- 100 GB or more of disk space (needed for recordings, SSD recommended)
- 50-250 Mbits symmetric Internet or more
- An A DNS record (konferans.kockerim.com ) for the SSL certificate
- IPV4 and IPV6 addresses
The ports that must be open on the firewall are as follows.
When you update the domain and email address in the command below, it will perform the required installation together with the SSL certificate.
wget -qO- https://ubuntu.bigbluebutton.org/bbb-install.sh | bash -s -- -v bionic-230-dev -s konferans.kockerim.com -e kerim@kockerim.com -a -wInstalling Docker 5 for Greenlight
curl -fsSL https://download.docker.com/linux/ubuntu/gpg | sudo apt-key add -sudo apt-key fingerprint 0EBFCD88Paste the command below into your SSH window as a whole:
sudo add-apt-repository \
"deb [arch=amd64] https://download.docker.com/linux/ubuntu \
$(lsb_release -cs) \
stable"
Update the packages:
sudo apt-get updateInstall Docker
sudo apt-get install docker-ce docker-ce-cli containerd.io nano -yInstalling Greenlight
Create the required directory and go to it:
mkdir ~/greenlight && cd ~/greenlight
Greenlight will read its environment configuration from the .env file. To create this file and download the Greenlight Docker image, run:
docker run --rm bigbluebutton/greenlight:v2 cat ./sample.env > .env
Next, note down the Greenlight secret key generated by the following command:
docker run --rm bigbluebutton/greenlight:v2 bundle exec rake secret
Sample output:
bbbb88f3dce411e706327abc8df673912fd3ff1decfa4b24c9a349acaff807a6d35a5473aacc0f9a06852275295a105e3d7e8f6496e2378a7709529e1b6ca78e
Open the .env file for editing with the command below:
nano .env
In the editor that opens, paste the secret key you just generated into the SECRET_KEY_BASE field, then save and exit.
It should look like this:

Run the following command and note down the BigBlueButton secret key generated by it:
sudo bbb-conf --secret
Sample output:
URL: https://konferans.kockerim.com/bigbluebutton/
Secret: f1ea9564HdRtUcdjJEiZgCKhGpJnaPqspyTGE3WGN8
Open the .env file for editing with the command below:
nano .env
In the editor that opens, paste the secret key you just generated into the BIGBLUEBUTTON_ENDPOINT and BIGBLUEBUTTON_SECRET fields, then save and exit.
It should look like this:

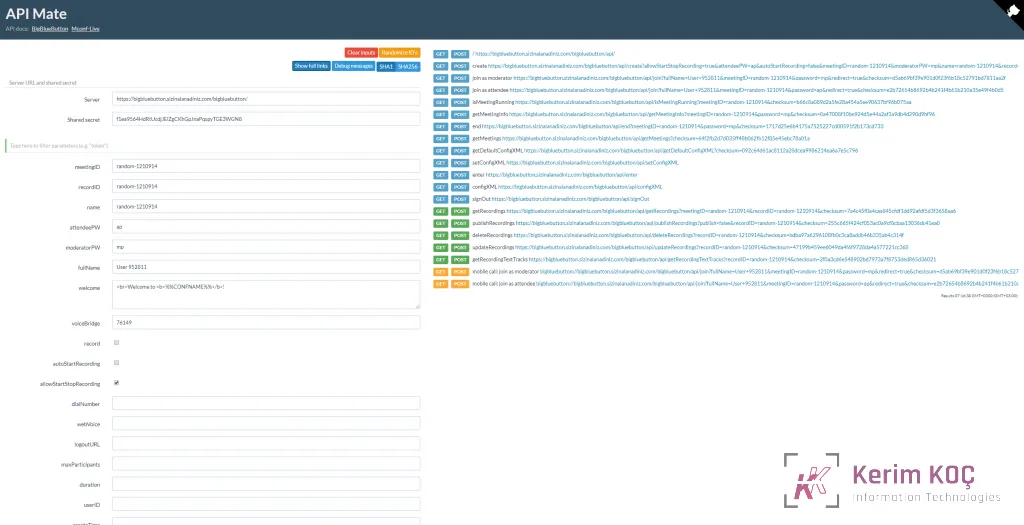
To check the API, you can edit the address below to match your setup and visit it:
https://mconf.github.io/api-mate/#server=https://konferans.kockerim.com/bigbluebutton/&sharedSecret=f1ea9564HdRtUcdjJEiZgCKhGpJnaPqspyTGE345sd
You should see a screen like this:
Open the .env file for editing with the command below:
nano .env
Find the ENABLE_SSL=true line and enable it by removing the # sign at the beginning.
It should look like this:

Check your configuration:
docker run --rm --env-file .env bigbluebutton/greenlight:v2 bundle exec rake conf:check
The output should be as follows:
Checking environment: Passed
Checking Connection: Passed
Checking Secret: Passed
In other words, it should look like this:

Configure Nginx with Greenlight
docker run --rm bigbluebutton/greenlight:v2 cat ./greenlight.nginx | sudo tee /etc/bigbluebutton/nginx/greenlight.nginx
Restart Nginx:
sudo systemctl restart nginx
Configure the BigBlueButton home screen with Greenlight
sudo nano /etc/nginx/sites-available/bigbluebutton
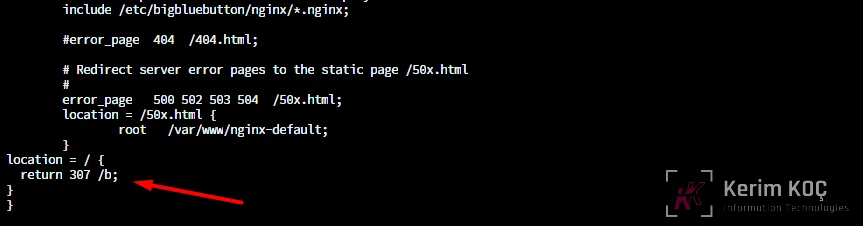
Add the following just before the final } character at the end of the file:
location = / {
return 307 /b;
}
It should look like this:
Restart Nginx:
sudo systemctl restart nginx
Installing Docker 5 Compose for Greenlight
sudo curl -L "https://github.com/docker/compose/releases/download/1.25.5/docker-compose-$(uname -s)-$(uname -m)" -o /usr/local/bin/docker-compose
sudo chmod +x /usr/local/bin/docker-compose
sudo ln -s /usr/local/bin/docker-compose /usr/bin/docker-compose
Start Greenlight
cd ~/greenlight
docker-compose --version
It should look like this:

docker run --rm bigbluebutton/greenlight:v2 cat ./docker-compose.yml > docker-compose.yml
export pass=$(openssl rand -hex 8); sed -i 's/POSTGRES_PASSWORD=password/POSTGRES_PASSWORD='$pass'/g' docker-compose.yml;sed -i 's/DB_PASSWORD=password/DB_PASSWORD='$pass'/g' .env
docker-compose up -d
If you want to restart Greenlight in the future, you can run the following commands in order:
cd ~/greenlight
docker-compose down
docker-compose up -d
Creating accounts:
Regular user:
cd ~/greenlight
docker exec greenlight-v2 bundle exec rake user:create["Muhammed Kerim KOÇ","test@kockerim.com","Kerim123","user"]
User with administrator privileges:
docker exec greenlight-v2 bundle exec rake user:create["Kerim KOÇ","kerim@kockerim.com","Kerim1234","admin"]
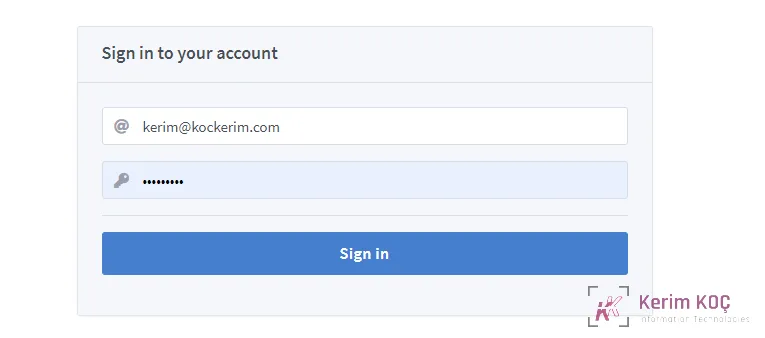
Great! Now go to your domain and log in to BigBlueButton:

If you get an error, do the following.
cd ~/greenlight
Docker pull bigbluebutton/greenlight:v2
docker-compose down
docker-compose up -d
docker run --rm --env-file .env bigbluebutton/greenlight:v2 bundle exec rake conf:check


